This is the fifth article in our tree house project. My plan this year is to build a tree house for my son. Click here to start from the beginning of this exciting project.
The idea is to build a hexagon shaped tree house. I’ve started the initial plans on paper, as you can tell from the images below.
I’m in the process of gathering materials and working with what I already have. My thinking is to build all the components first and then have a party and invite others over to put the thing together.
One of the challenges is designing this without knowing what materials will be available. Since I’ve been collecting materials for several years, I have a good starting point.
I imagine it will take all summer (2018) and fall to get the pieces built.
I’d love to get your feedback and comments. Please share this article with your friends and family.
Wall Plans
Now that we have the wall frames completed, we can move forward with finishing the outside walls. The exterior of the walls will consist of various sizes of reclaimed boards from discarded pallets. I’ve been saving a lot of different boards and I think I have enough to complete 4 walls.
Materials
- (52) Various size boards. Some oak, pine, popular, mahogany boards. Each wall required 13 boards to cover the entire 4ft by 5ft wall.
Cost
The lumber for the walls was taken from discarded pallets. (FREE) It took some hard work to cut, sand and stain them, but for free materials I’m willing to do the work.
Lumber – Free
Spax Screws – $7.97
Stain – $100.18
Router bit – $18.99
I’m still happy and using Earth-Paint Rain forest Sealer. Since I’m all out of stain, I ended up buying a gallon of the rain forest sealer clear coat, no color or tint. I plan to use this on the exterior walls and on the center wall section not built yet.
Cuts
Each board was cut to size 4ft wide. Since theses are rough cut boards that were re-purposed, we needed to measure and cut each board individually. One of the challenges is using different sizes of lumber.
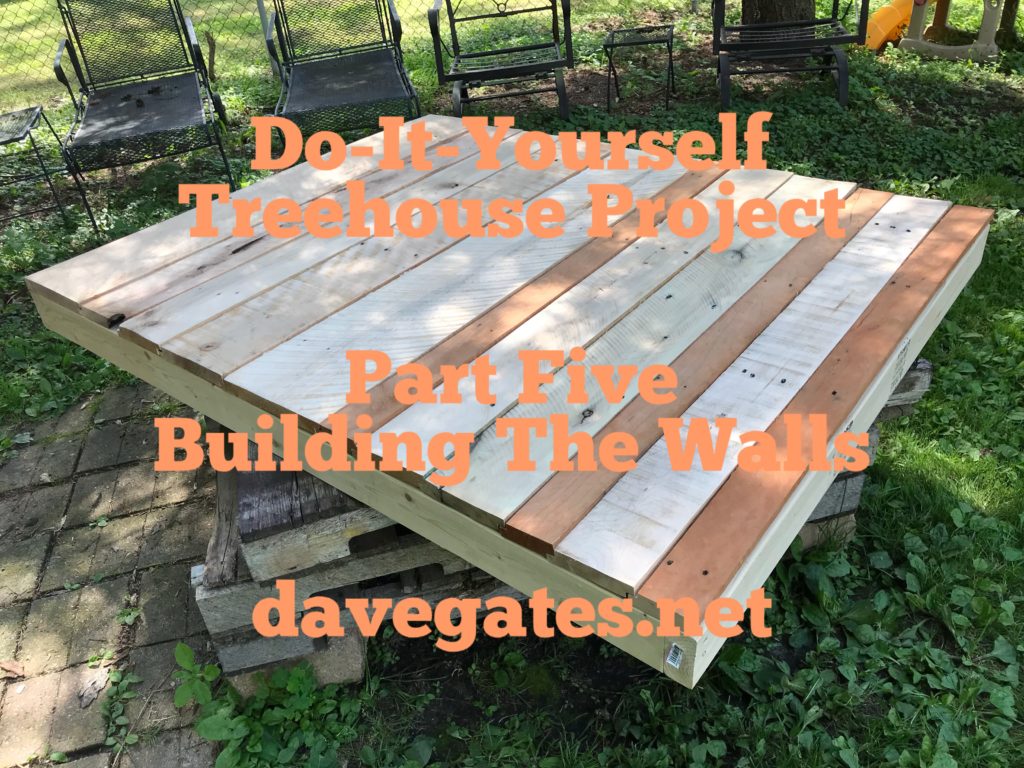
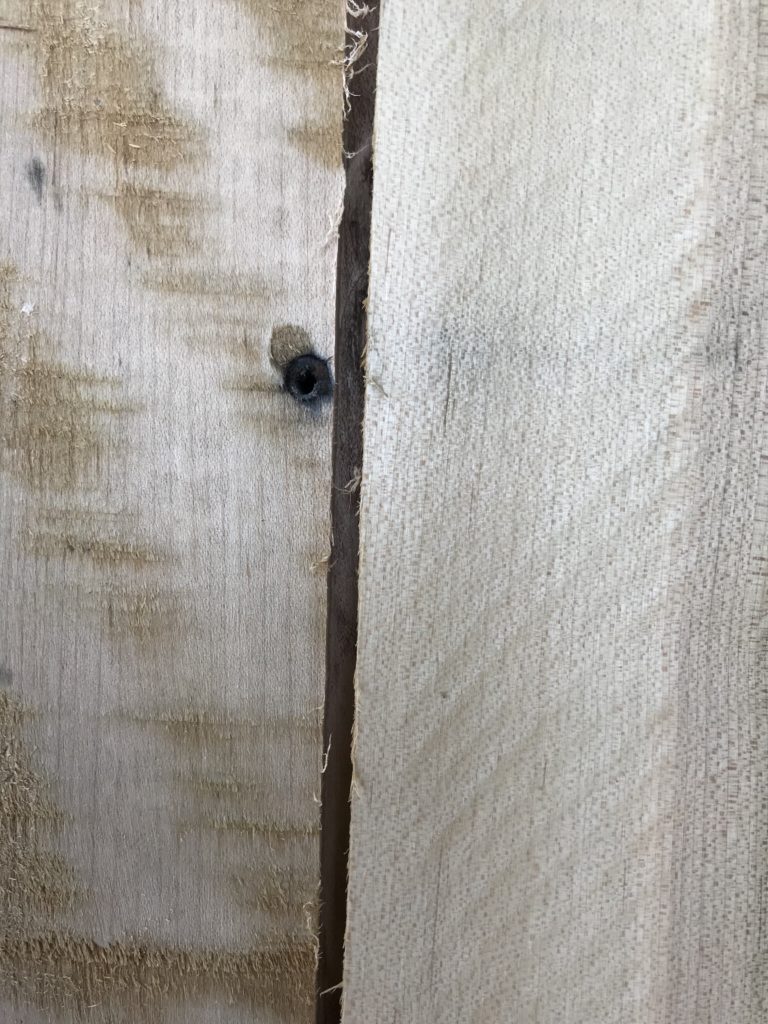
We are also using boards that may not be entirely straight, some adjustments were needed. In fact one reason for cutting a rabbet on each board was to compensate for the various space between the boards. Cutting a rabbet into each board worked perfectly but took a long time to complete.
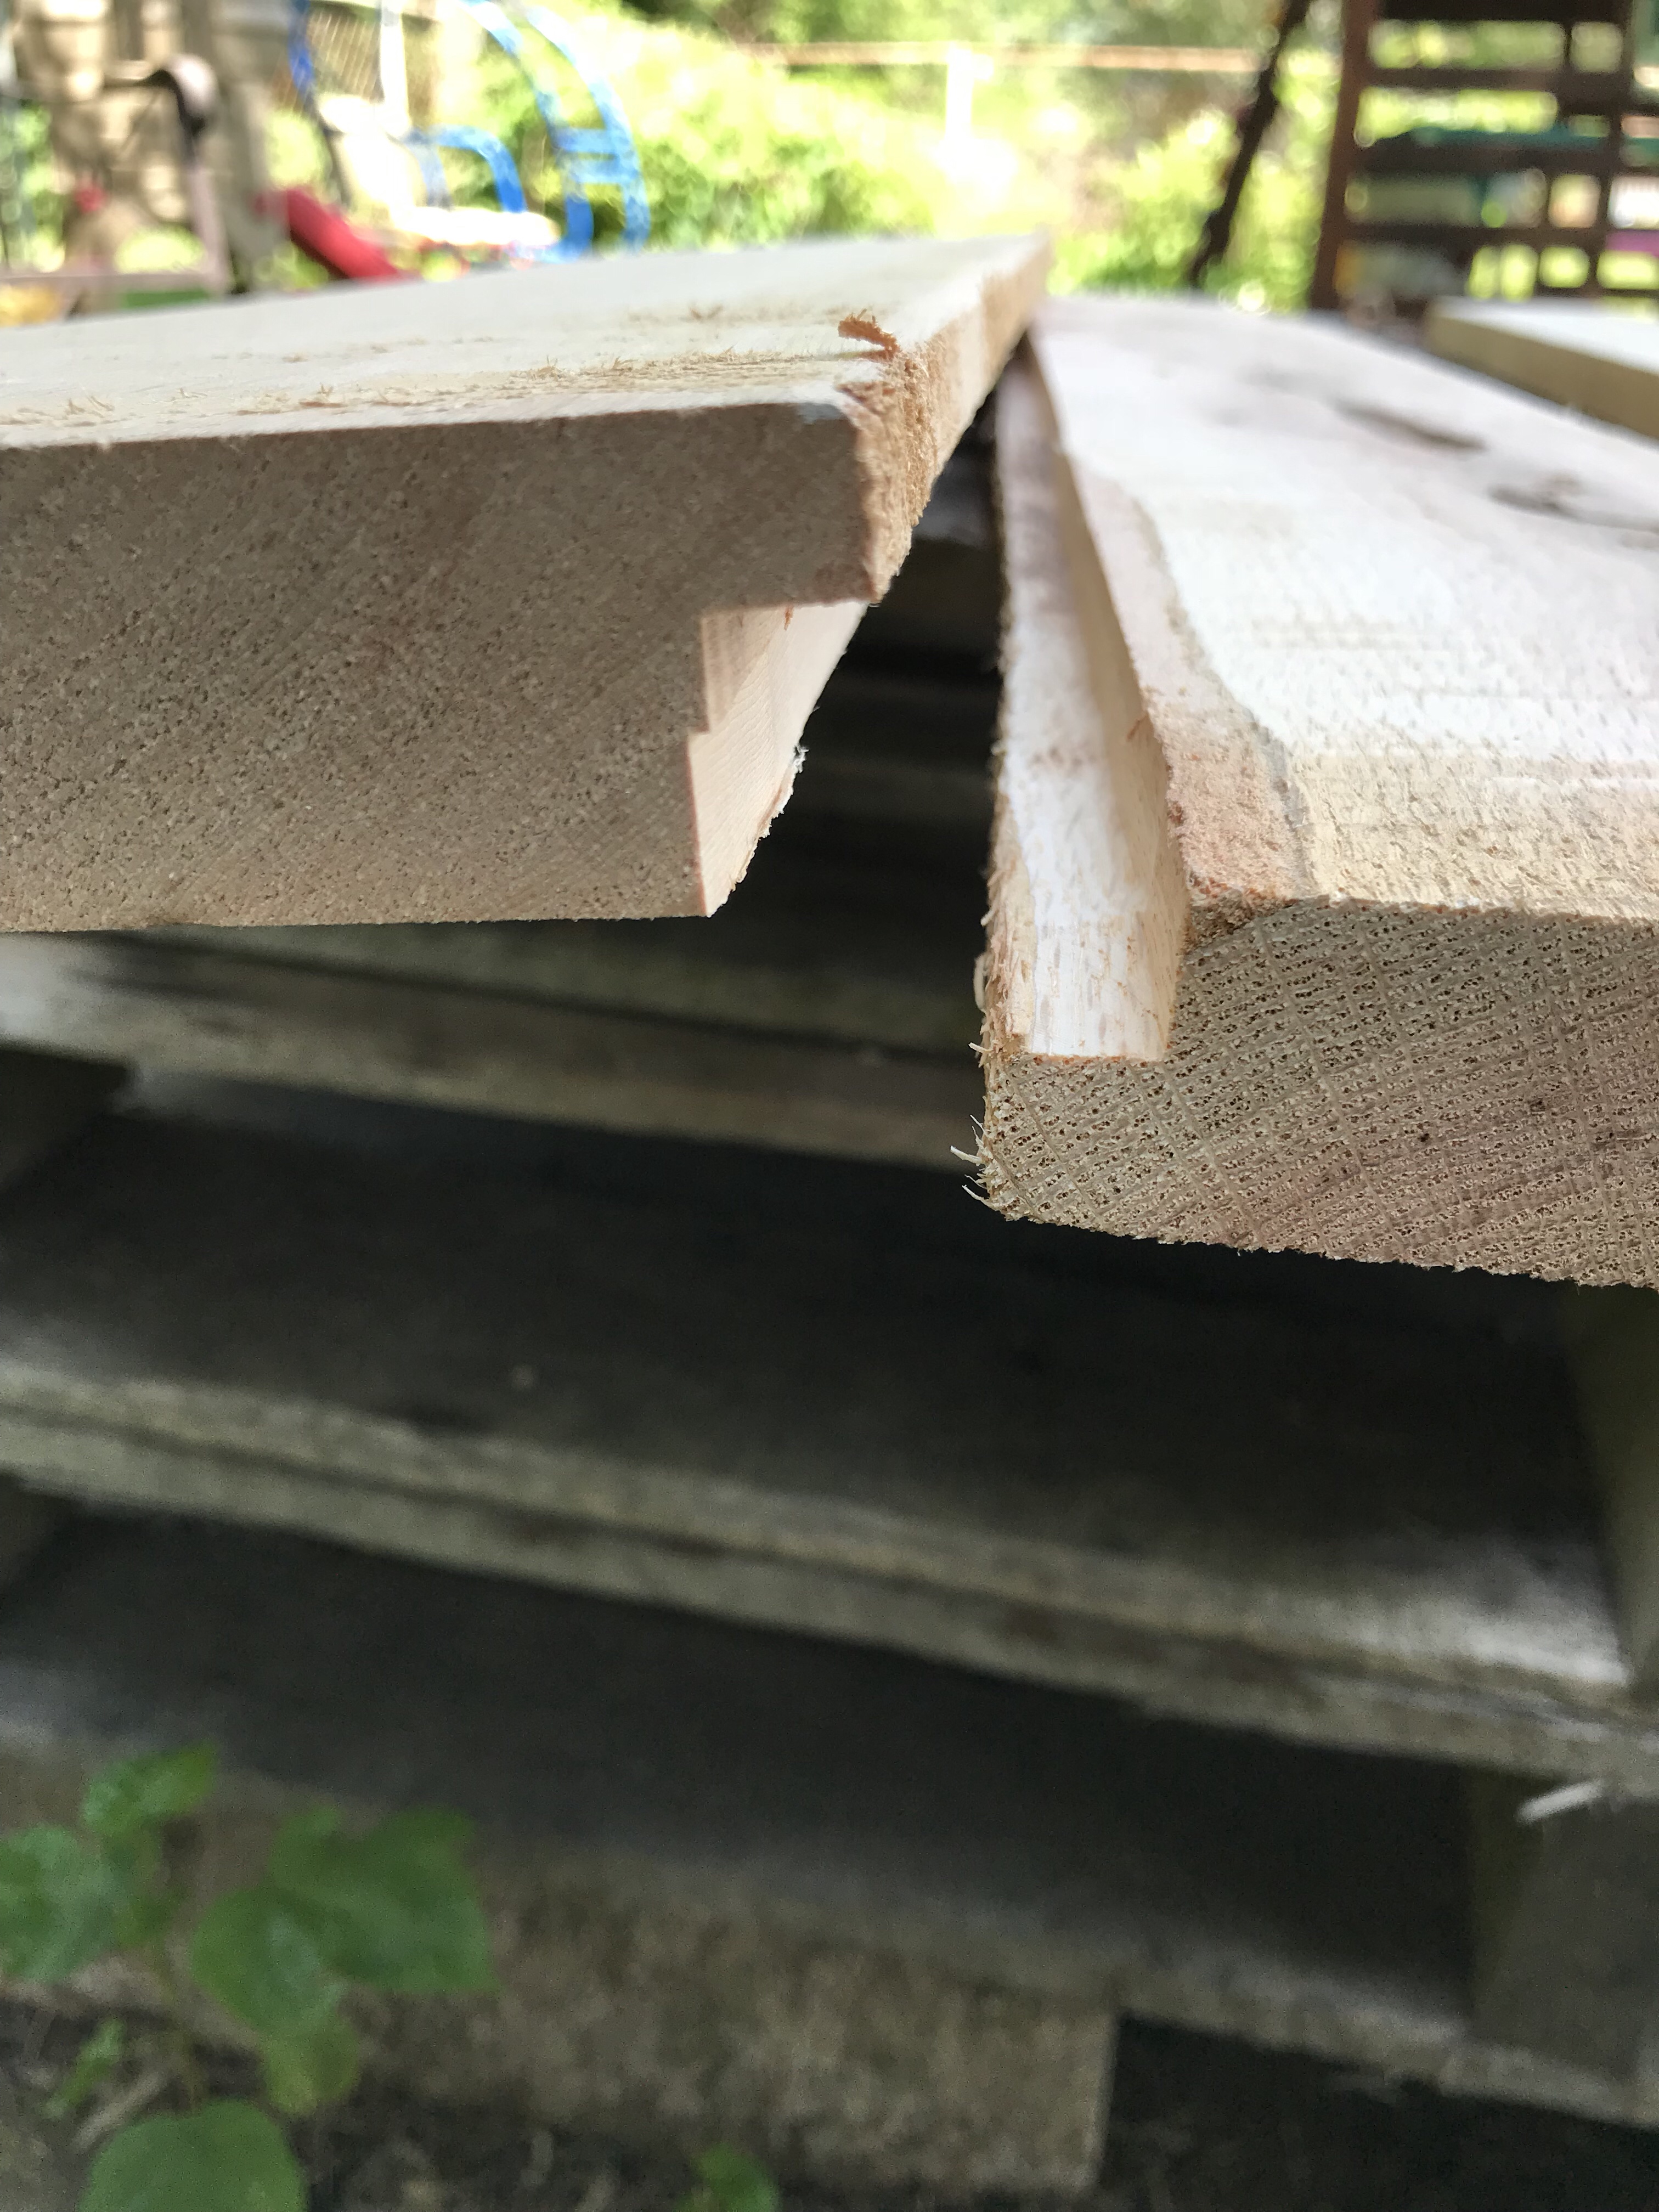
As you can see in this image, the two pieces come together to form a better wall.

Each board was sanded on the outside to remove blemishes and stains.
The rabbet cut created a better seal between the various boards and allows for expansion and contraction.
You will also notice the thickness of each board varied. So cutting the rabbet also allowed fitting the boards together easier and more uniformed.
As you can see there is a gap between the boards in the image below. Cutting a rabbet on the edges of the boards created a more solid look. This way when you look at the wall, it doesn’t have the appearance of having holes in it. The reason for the gaps is because not all the boards are straight and true, so to manage this discrepancy, I decided the rabbet cut would solve this variance issue.

Lessons Learned
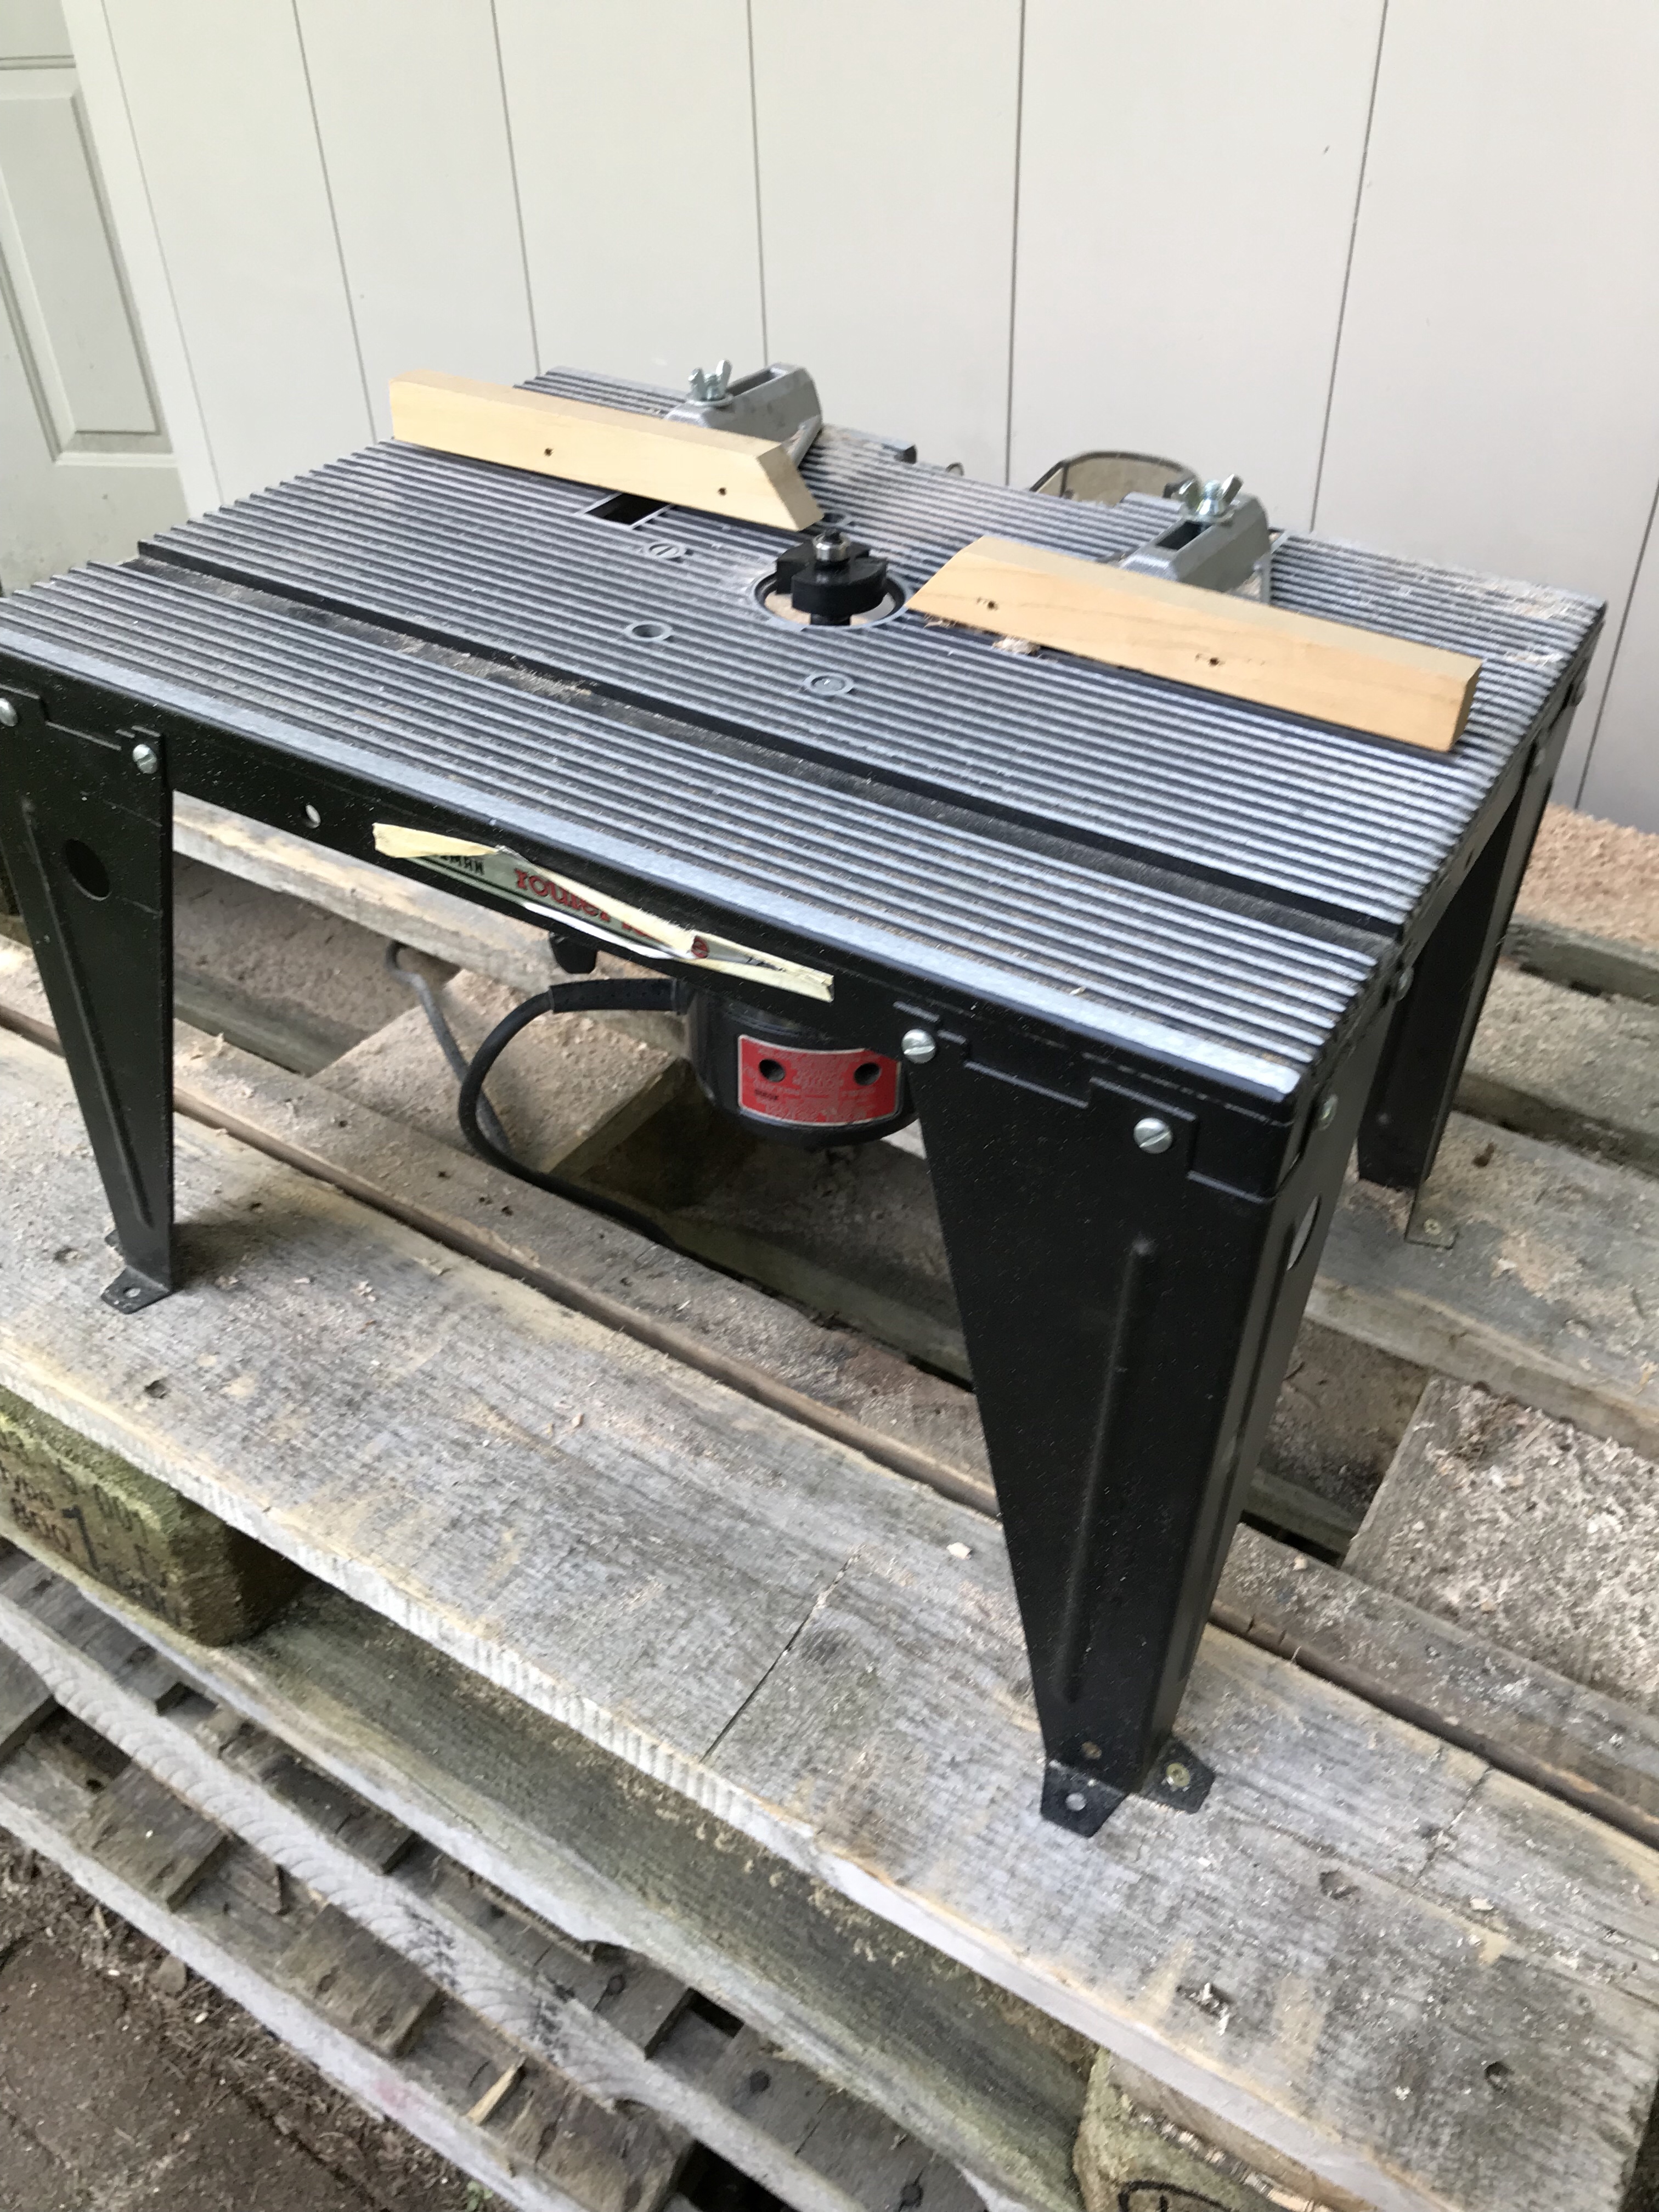
There was definitely a learning curve when using the router table I have. Thanks to my father, I did not need to go out and purchase a router or table. I was able to use the one he handed down to me. I did purchased the rabbet bit to make the cuts.
Frustration kicked in when the bit kept coming out of the socket and I needed to take the router out of the table to make the adjustments. I’m not sure if this is because I was trying to cut really hard oak or if it is just a temperamental router.
At any rate I must have had to stop this process 20 or more times to adjust the router bit. As they say, practice makes perfect and once I found a system it was much easier and quicker.
Note to self, pine is so much easier to cut and mange than the hard red oak boards.
Another challenge is working outside. I knew cutting the rabbet’s was going to be messy so I setup the router table in the back yard.
The mosquitos are also horrible this year, so I’ve also had to cover my self with bug spray. Even after dosing myself with spay they still managed to get me.
What can you do?
- Part Six
- Part Four
- Comment below, Even if it is just to check in and say Hello. I look forward to hearing from you.
- Share this article with your family and friends.
- Sign up for our newsletter.
Like me on Facebook, follow me on Twitter, circle me on pin me on Pinterest, or watch me on Instagram.
Thank you,
Dave
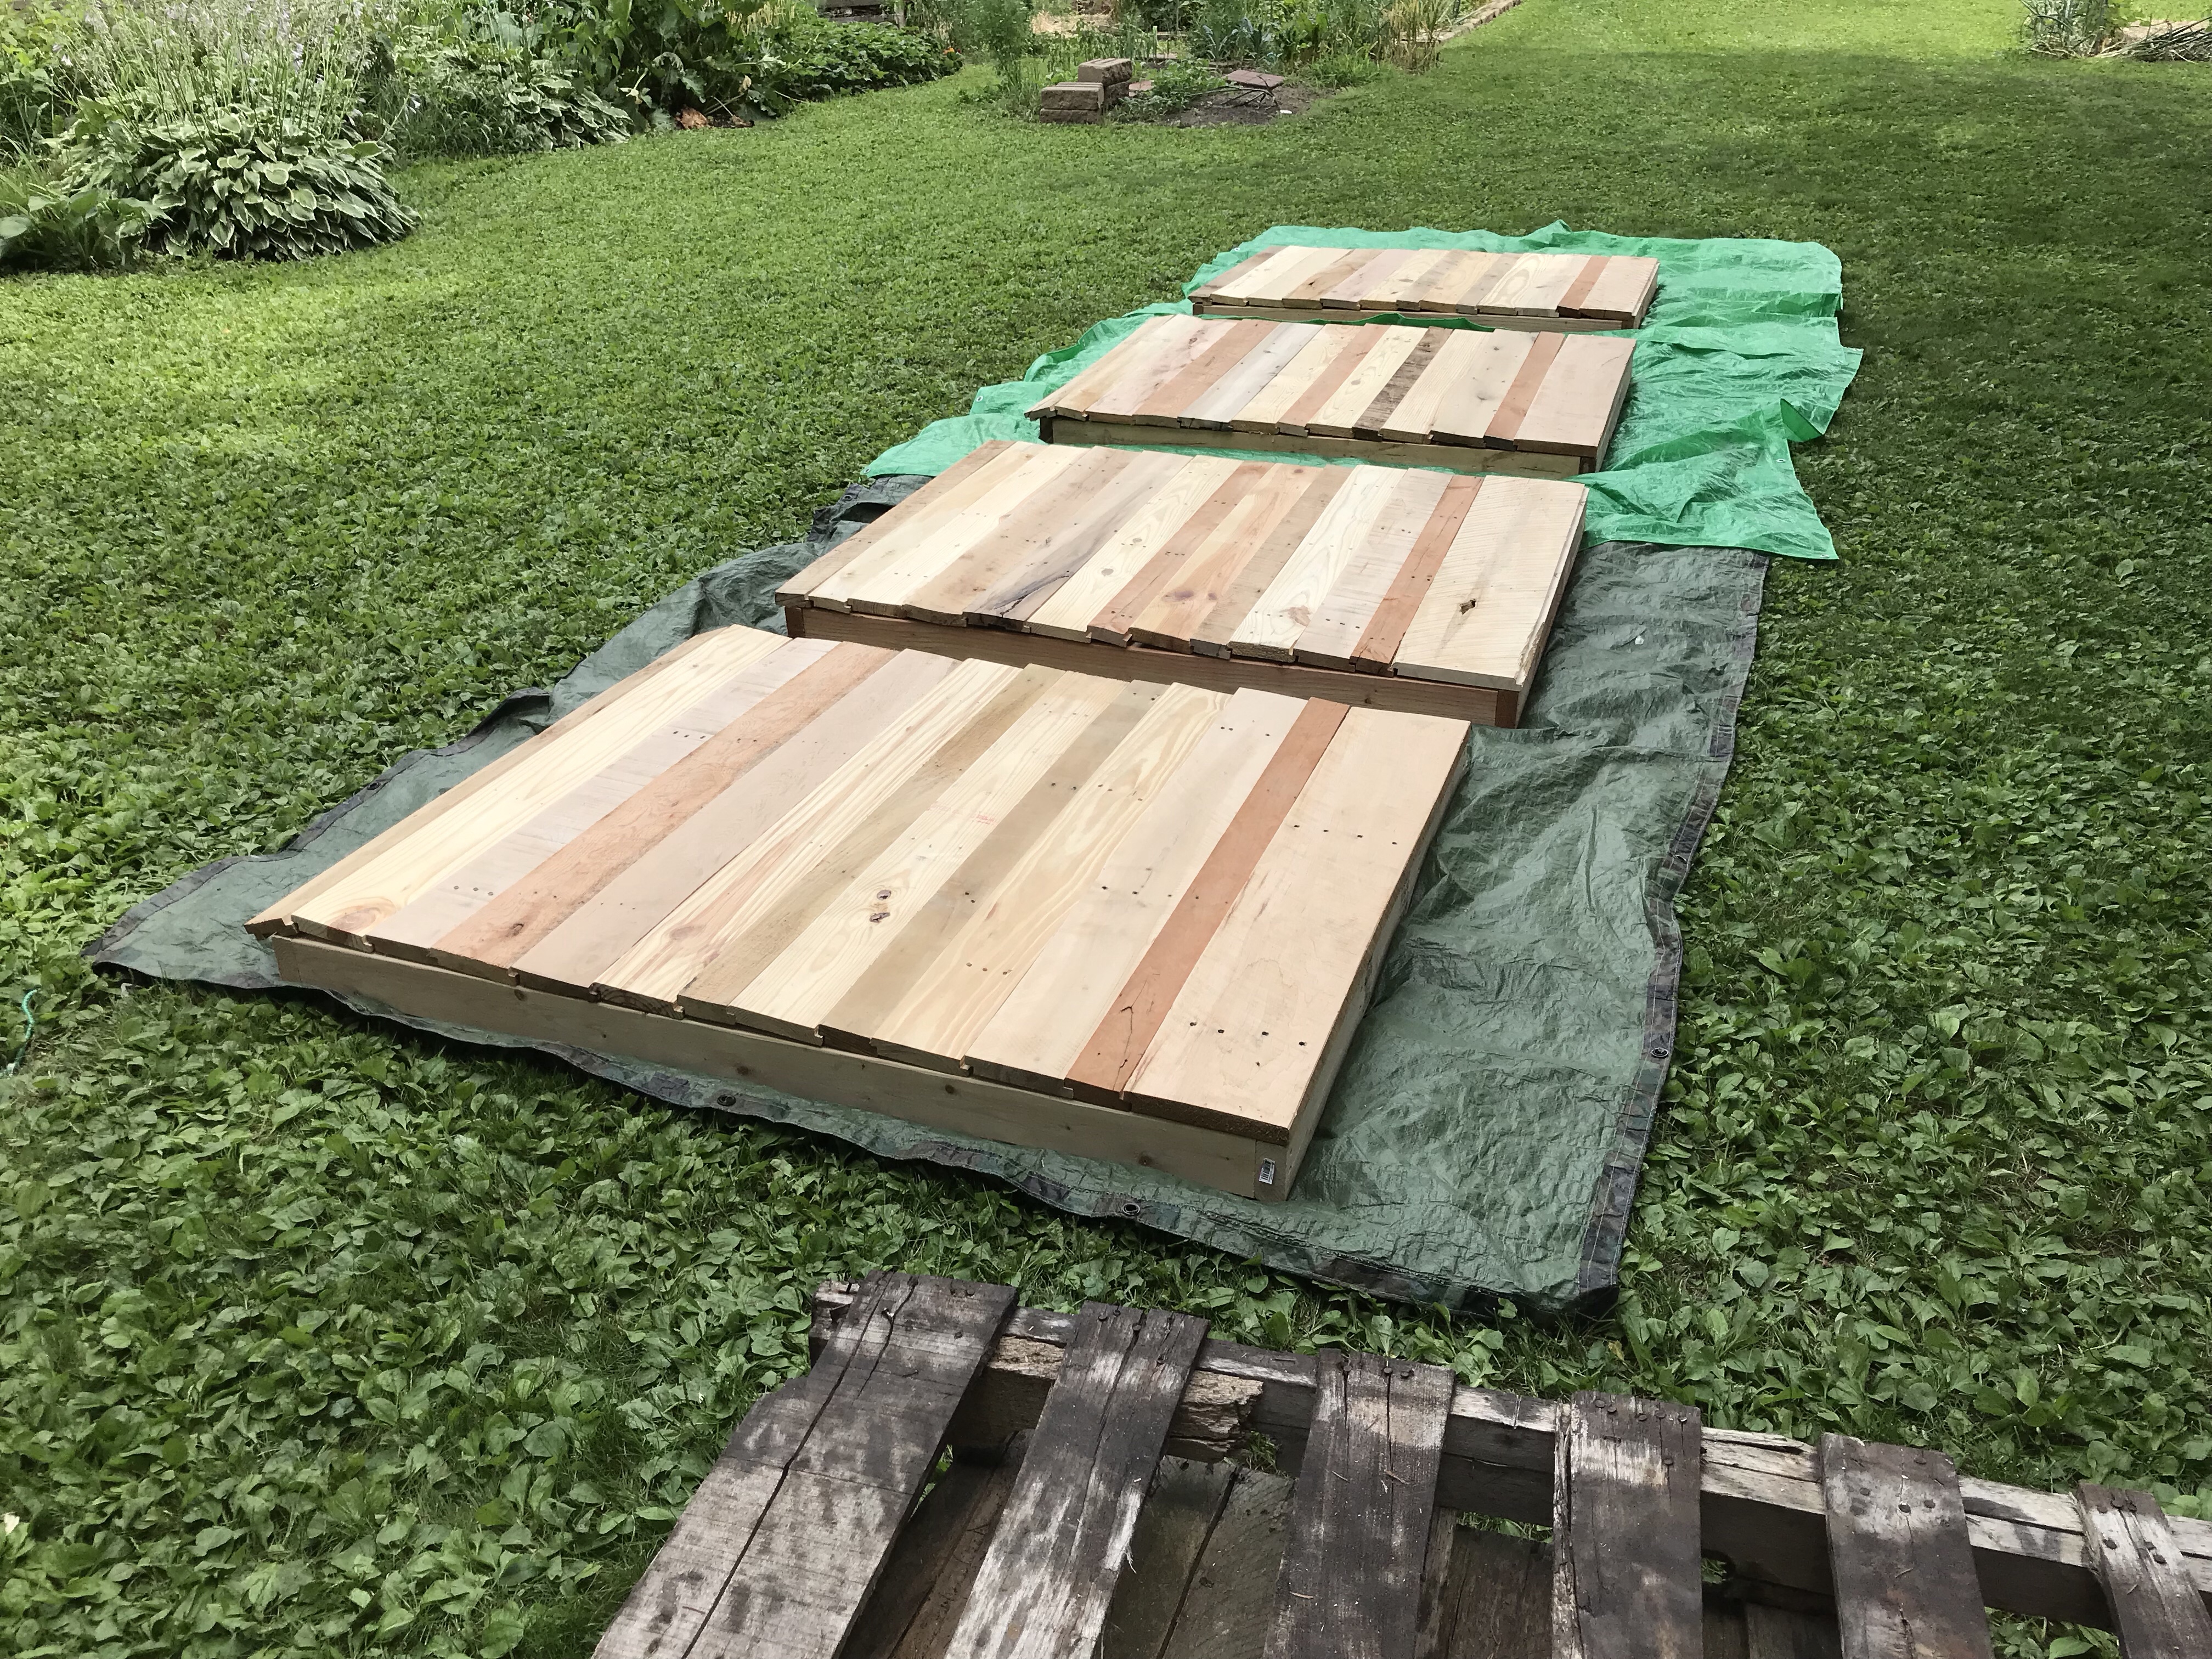
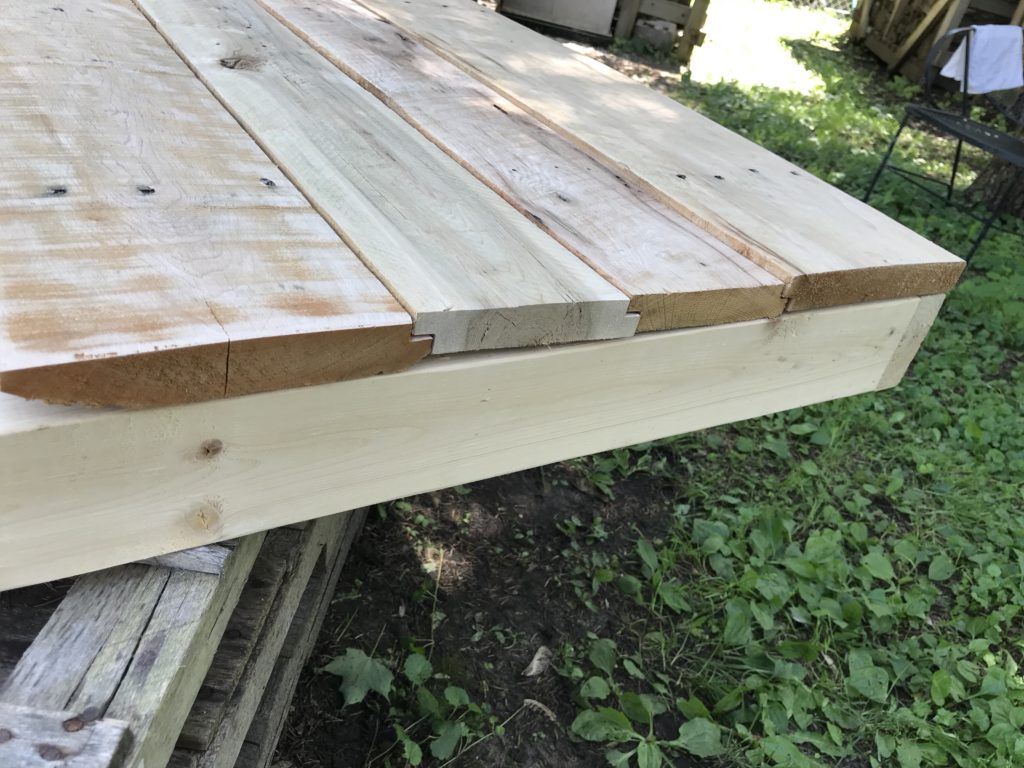
And here are the four finished walls. The boards still need to be secured to the frames and the walls need to be stained, but for now they look pretty good.
Remember two of these will need windows, so we’ll cut those out later.