
This is the fifteenth article of our treehouse project. My plan this year (2020) is to complete working on the treehouse. Click here to start from the beginning of this exciting project.
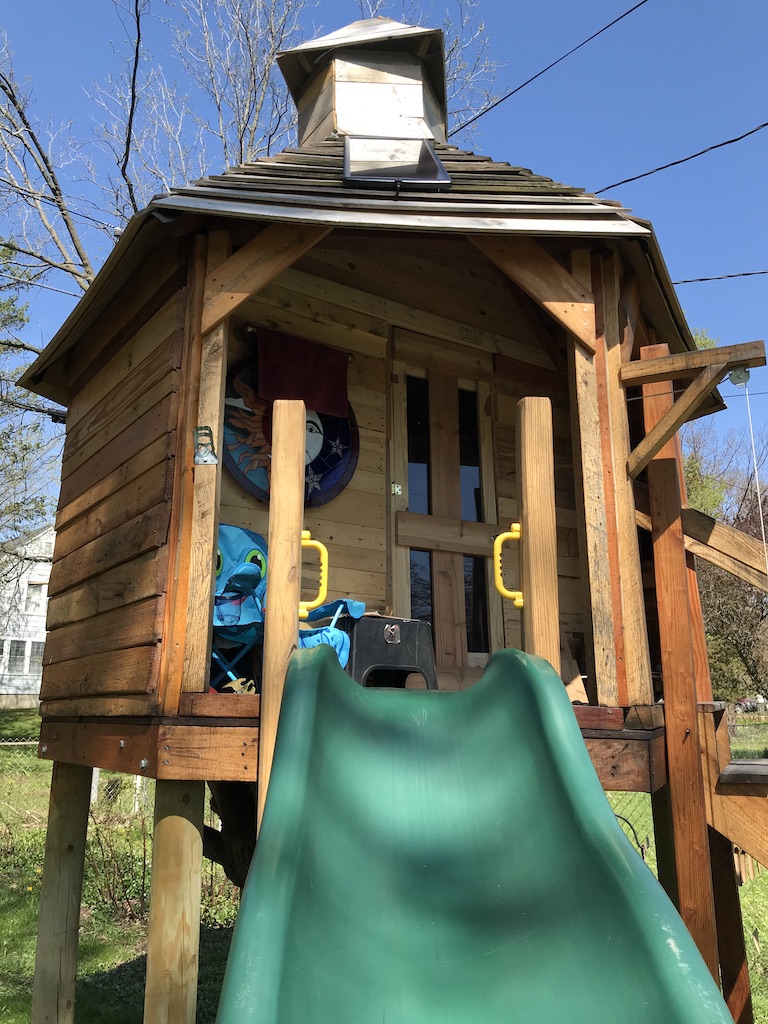
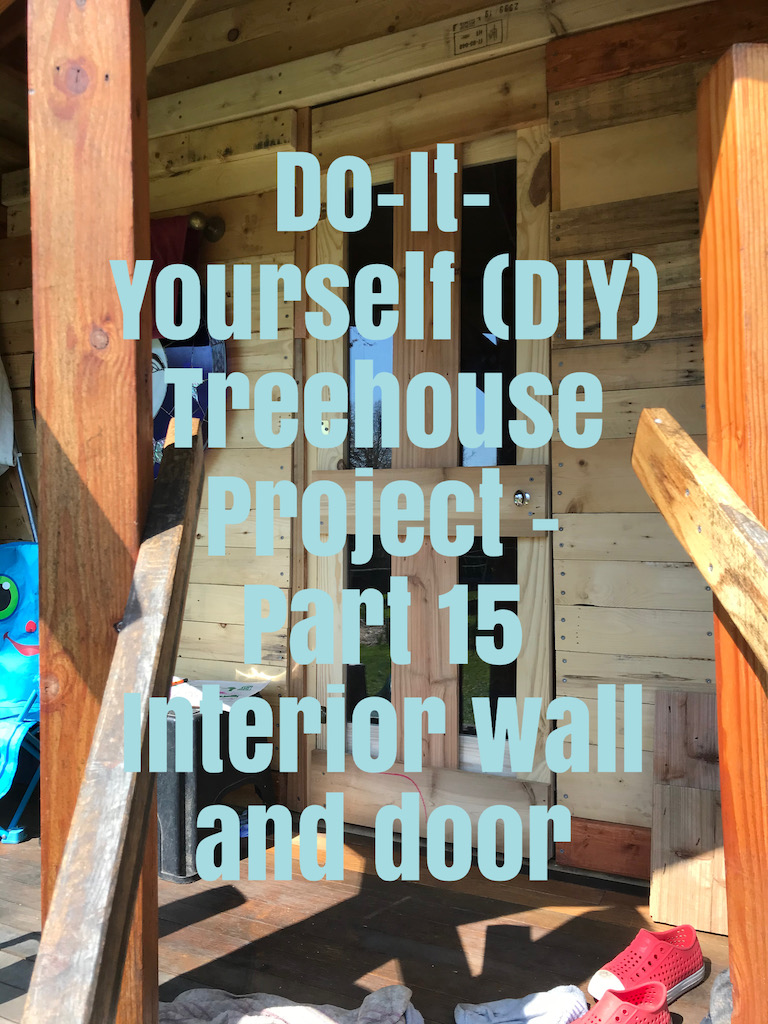
The idea is to build a hexagon shaped treehouse. This article discusses the interior wall & door.
History
For the past three years I’ve been working on a treehouse for my son. With the current shelter-in-place orders due to the COVID-19 pandemic I’ve found ample time to push this project to completion.
When I drew up the initial designs, I knew I’d eventually build a wall and door to enclose part of the structure. My thinking was to have a 3-season room which would allow us to use the treehouse even during inclement weather.
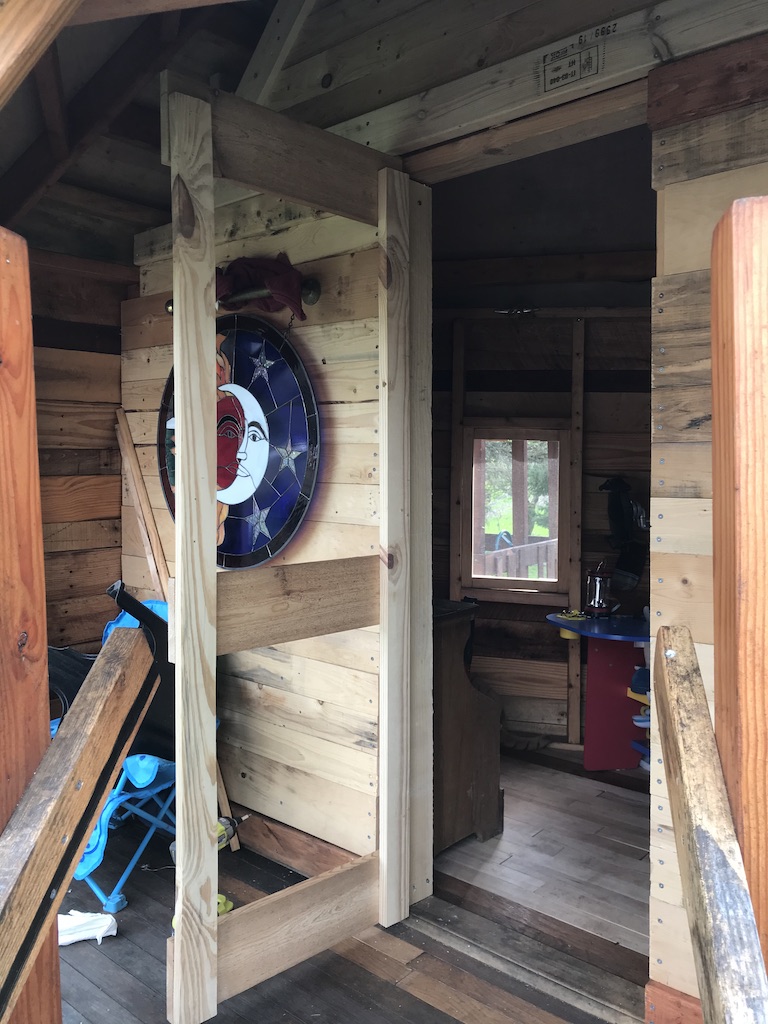
Interior Wall & Door
I’ll be honest, I had no plans for this or even if I was going to have enough lumber. I simply took a few measurements and set off to create something that would resemble a wall and door. I thought 2 feet would be ideal for the door opening and then based my design and measurements from that.
In the image below, the wall to the left is 3 feet, the door opening is 2 feet, and the wall to the right is about 18 inches.

The door ended up being a little less than the two feet I planned. This was due to the adjustments and working with lumber that wasn’t entire straight and true.
Materials
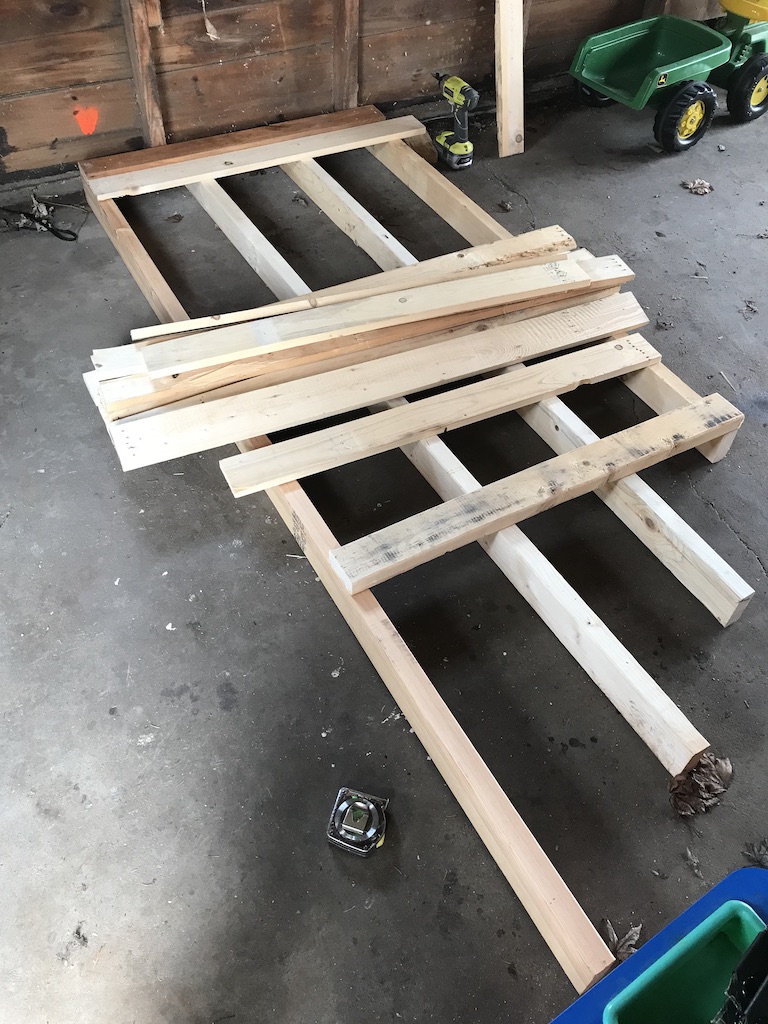
Every piece of the wall and door was constructed from left over pieces of pallets and discarded boards. I used left over 2 x 4’s to frame the walls and left over 1 x 4’s to cover the siding. Everything was custom cut. Because of all the ambiguity in creating this, exact measurements were difficult.
The window for the door was left over clear acrylic I inherited from my parents when they moved. It has been stored in the garage for years. It worked perfectly for the door and allows ample light to flow into the room.
I found the hardware for this part of the project in boxes of left over scraps. Most of this was given to me when my parents moved. Some of this was left over from our current house. It doesn’t really matter, except that I didn’t have to purchase any parts to complete this part of the project. We were able to reclaim and use discarded parts. If I would have had to purchase these item here is what that would have looked like.
- 2 x 4 studs for the frame
- 1 x 4 for the sidling
- 3 brass hinges for the door hardware
- 2 chrome knobs for the door handle
- 1 1/4 Spax #8 screws and 2″ Spax screws, here is a picture of what they look like.
- Miscellanies acrylic for the window of the door


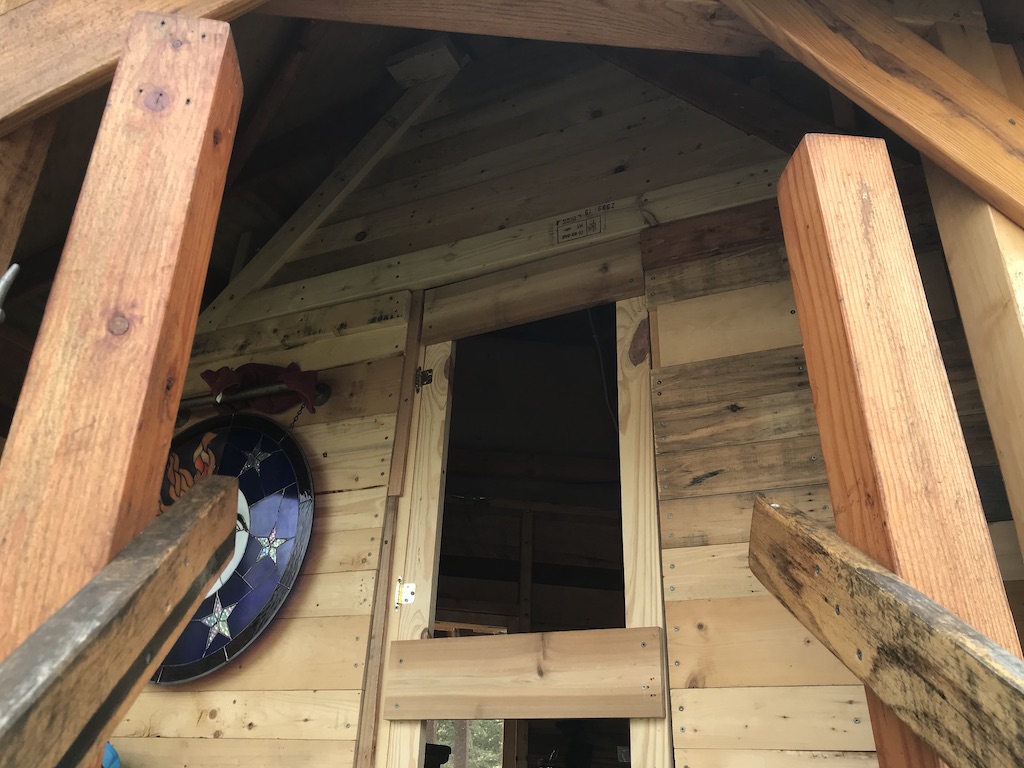
Building the wall and door
Building the wall was straightforward. I framed the walls in the garage with 2 x 4’s and brought them out to the back yard.
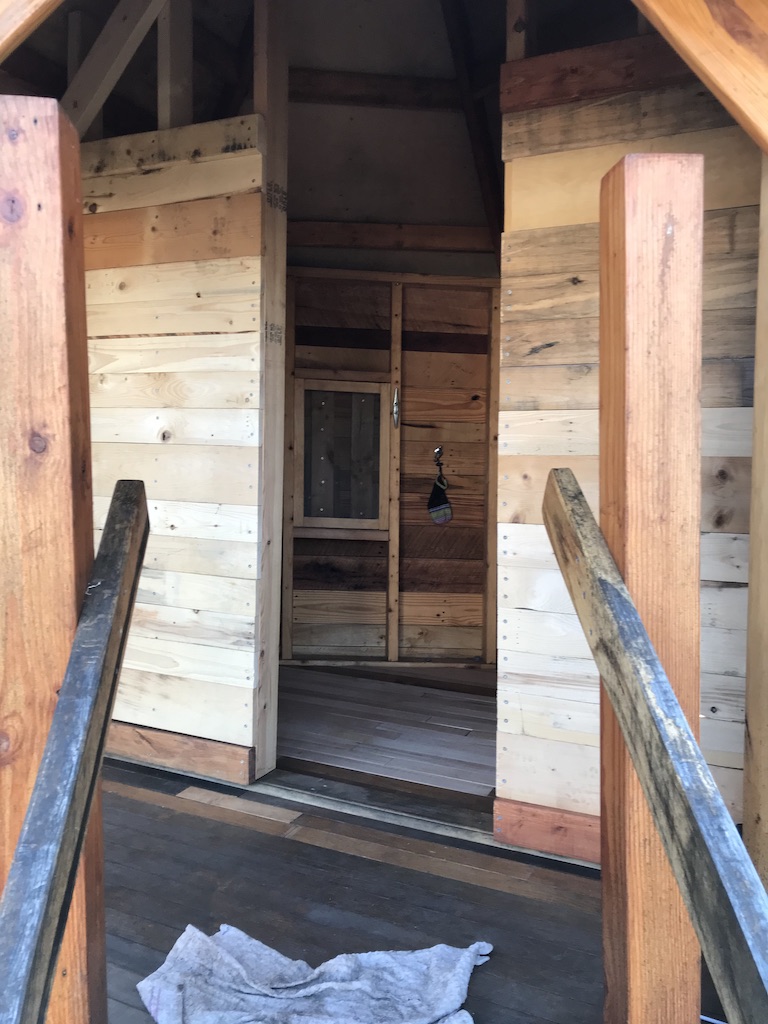
I squared up the frames and secured them to the floor, exterior wall and ceiling. Once the frames where done, I cut and secured the siding boards to the frames. This went quickly once I was setup.
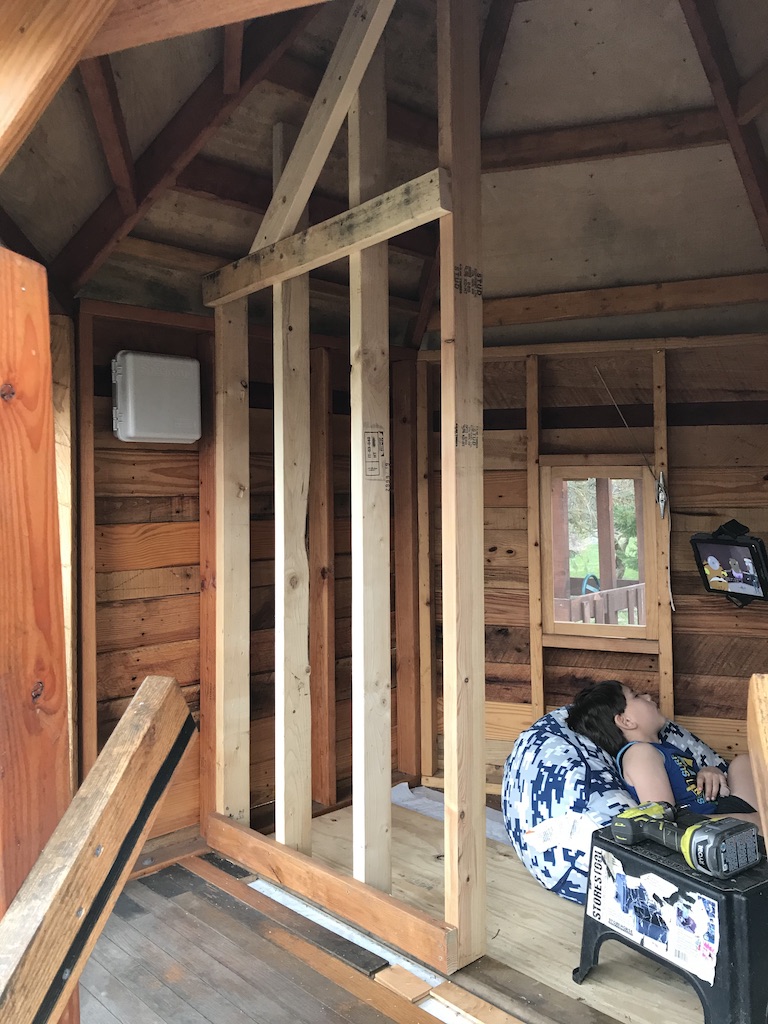
Lando chilling while daddy works on the treehouse.
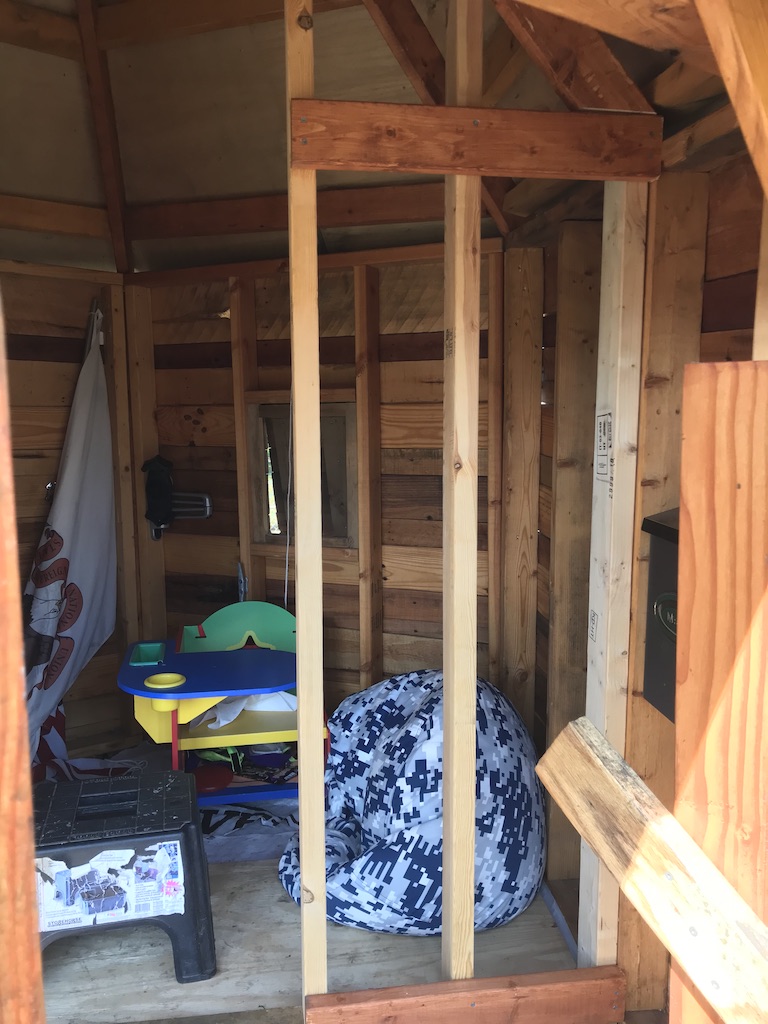
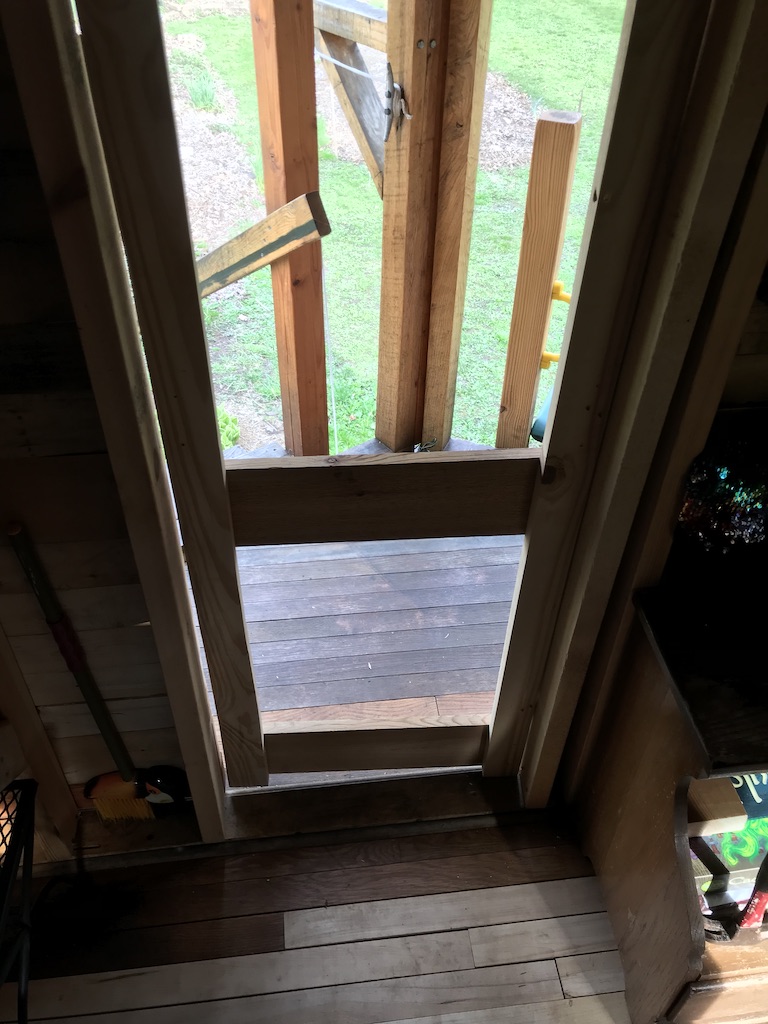
The Image below shows the two walls and rough opening for the door.
Building the door was a bit more difficult. As I mentioned the boards and lumber I had were not straight/true boards. Once I cut them up, I noticed the shorter pieces were also warped. This made it more challenging to squarely frame the door.
Trying to get the door secured to the frame proved a bit more difficult on my own. The kid and wife were doing other things so I didn’t even bother them for assistance. I also realized the screws I had also went though the frame pieces and needed to figure out a way to modify this so they would not stick through and poke someone.
This process took me several attempts and walking back and forth from the garage to the backyard did take more time. Bonus the weather was great when I was working on this, so that made the job more enjoyable.
What I learned
If you have been following this story, you’ll know that 90% of the lumber used for this project was reclaimed lumber from various pallets.
This is still the case when I built the interior wall and door. The challenge is that not all the lumber is straight and true. When I went to build the door, the I boards I had were warped, but you use what you have and make it fit.
You get what you get, and you don’t have a fit? LOL!
When I tried to install the door, I needed to adjust the frame in such a way that the door hardware would work. I spent a good deal of time adjusting it so that it would actually open and close. I’m finding it harder to write this up and describe it. Maybe the images below will speak to the challenges.
The bottom line is, there are some gaps, and this isn’t entirely airtight, but it’s a kids treehouse and I felt the results were fine. It turned out way better than I thought considering the materials I was working with.

Not the most airtight door installation, but it works. You’ll also notice I added another 2 x 4 on the right site in the image below. This was to allow me to install a door that wasn’t square and a wall frame that was slightly angled. This also allowed me more surface area to screw in the hinges for the door.
Part of the fun of this project is to create something from what you have. I never wanted to go out and buy lumber, I wanted to use what I had or what I could find or reclaim. Consequently, I also didn’t want to spend an enormous amount of time sanding, staining etc, the idea was to just create a treehouse from raw materials.
You will notice in some of the images the boards are dirty, some have lettering and some have not been sanded smooth. Part of me wishes I would have cleaned up the boards to make it look nicer.
But there is also this part of me that wanted a raw, “this is what I have,” “this is what I used,” look and feel. While I achieved that look and feel, in hindsight, I wish I spent more time cleaning up the boards.
In my experience projects always take more time than you imagined. In this world where people expect instant gratification. Engaging in a project for over 3 years, does take an enormous amount of patience.
Updates
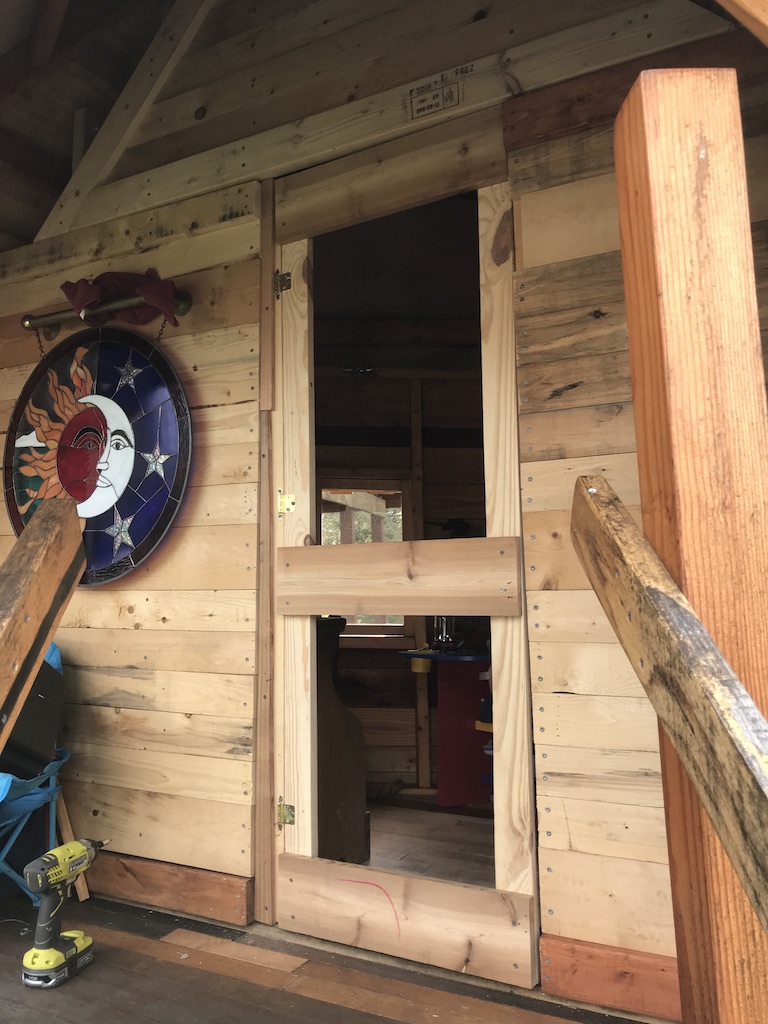
The interior wall and door are done. It seems to be working fine and gives the treehouse a nice “finished” look.
Up next is to figure out how to keep the mosquitoes out of the two large openings, one by the stairs, and the one by the slide. I’m thinking some form of magnetic screen door. I’ve seen these for patio doors, so maybe something like that would work. IDK, I’m just in the idea phase now. But it would be nice to sit outside during the summer and not be eaten up by mosquitoes. Something like this would be ideal.

I also purchased a 100 watt solar power kit to power the treehouse. The panels have been installed but I need longer cables and was waiting for additional parts before taking the final pictures and writing the article.
What can you do?
- Part Sixteen
- Part Fourteen
- Comment below, Even if it is just to check in and say Hello. I look forward to hearing from you.
- Share this article with your family and friends.
- Sign up for our newsletter.
Follow me on Twitter, pin me on Pinterest, or watch me on Instagram.
Thank you,
Dave Gates
The finished interior wall and door.