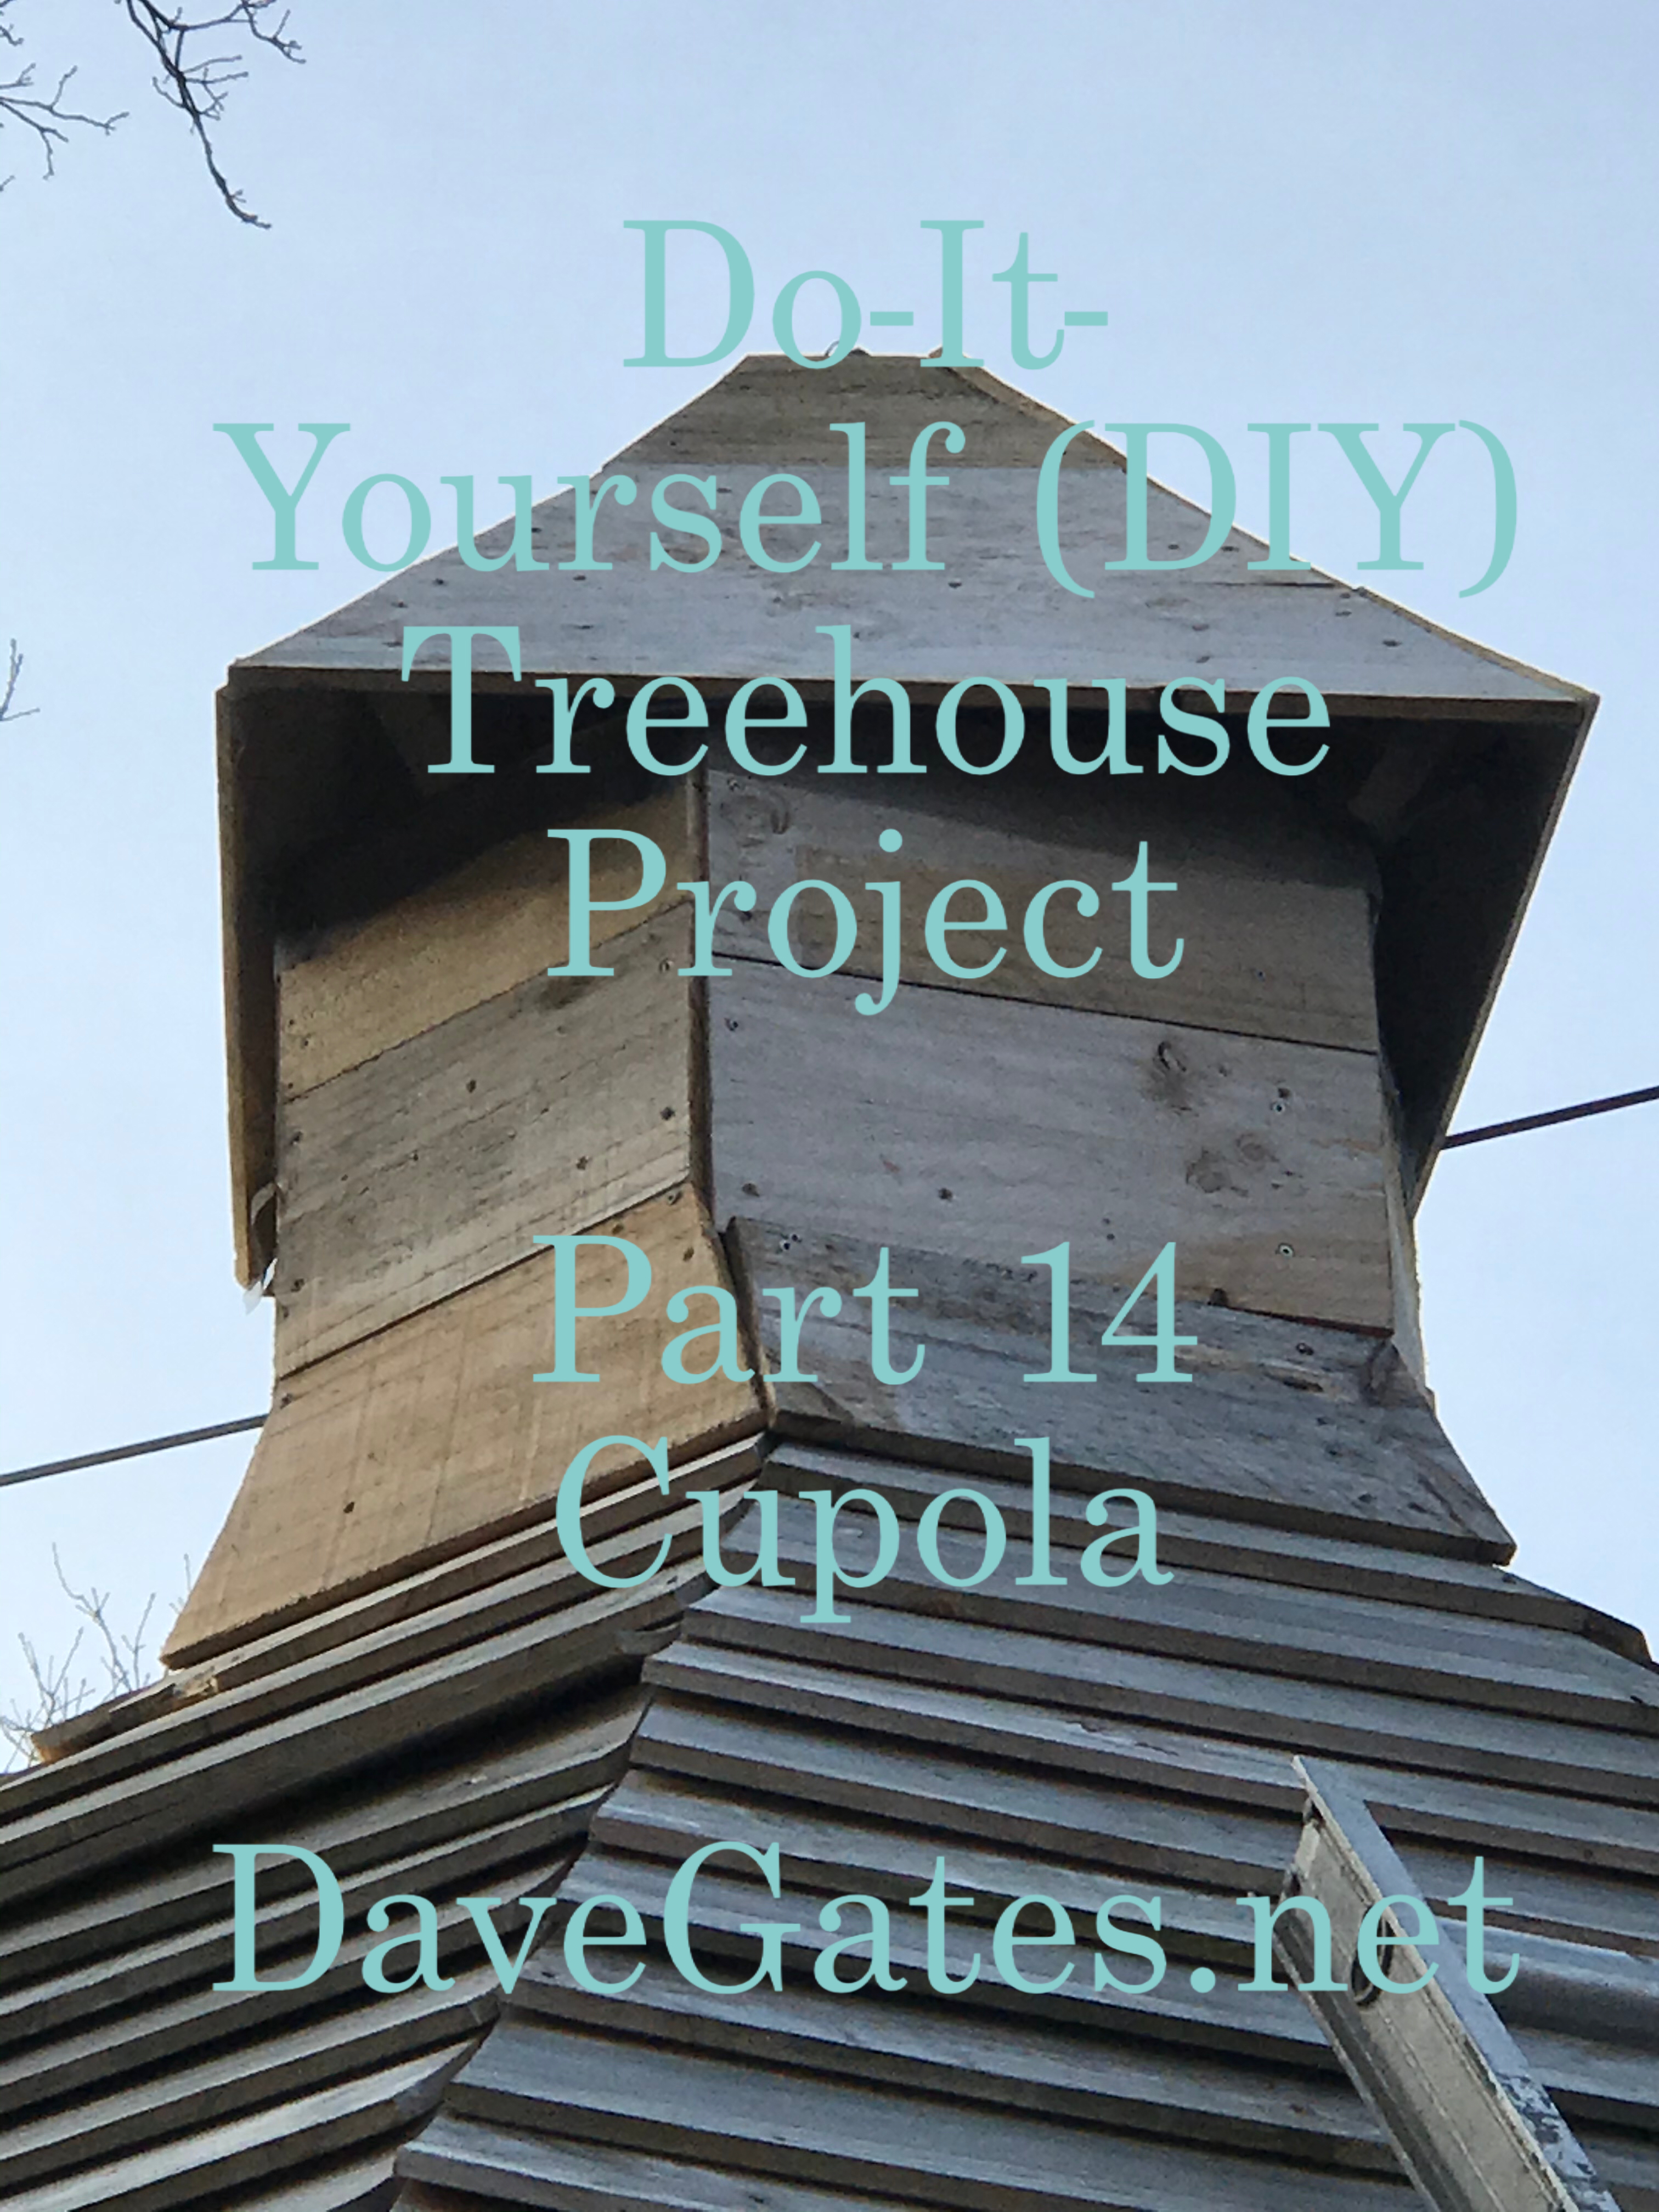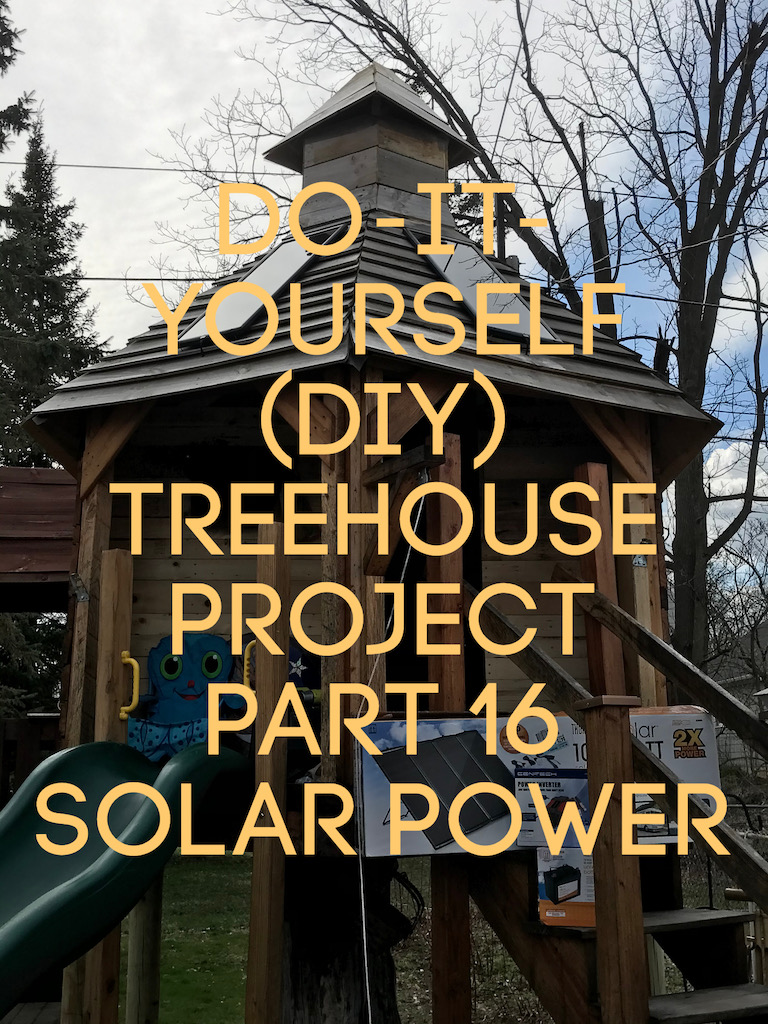

This is the sixteenth article of our treehouse project. The plan this year (2020) is to complete the project. The main structure is complete, the interior wall is done, It’s weathered several heavy rain showers and stayed dry inside. I’ve created exactly what I set out to do and now its just the finishing touches. Click here to start from the beginning of this exciting project.
The idea and plan from the start was to build a hexagon shaped treehouse. Now it’s time to focus on the finishing touches. This article discusses adding solar power.
History
For the past three years I’ve been working on a treehouse for my son. With the current shelter-in-place, I’ve found ample time to push this project to completion.
When I drew up the initial designs I knew there were going to be a few things I wanted which require power. At the time I had no idea how I was going to achieve this.
Here are the items that came to mind.
- The ability to use and charge an iPad so we could watch movies.
- The ability to power a fan during the summer to keep cool and also blow away the mosquitoes.
- Having lights for those cloudy days or late nights. Or early mornings for daddy.
- Running the capachino maker. (just kidding)
Solar Power
Quick disclaimer, I’m a newbie when it comes to solar power and the associated equipment required for setting this up. The following article is my experience setting up and installing solar power. This article is for your enjoyment and should not be used as instruction or authority in your own solar power projects.
Now that the attorneys have left the room we can get down to business.
I started researching solar panels years ago and read a few of articles. I initially found our local Menards carried a solar panel kit, but I wasn’t ready to install it at the time, so I never purchased it.
Do you ever notice when driving around there are those solar panels that power certain street lights or other utility equipment? The panel is about 2 feet by 2 feet and sticks on the pole of the light it is powering or servicing? I’ve always thought to myself that would be the perfect size or setup for our project.
Fast forward to March of 2020 and our local Menards is no longer stocking the solar panel kit I found years ago. However, our local Harbor Freight was offering a 100 Watt solar panel kit in their weekly flyer. This is perfect for our project, and since I was ready to buy, I drove to two different stores to get it.
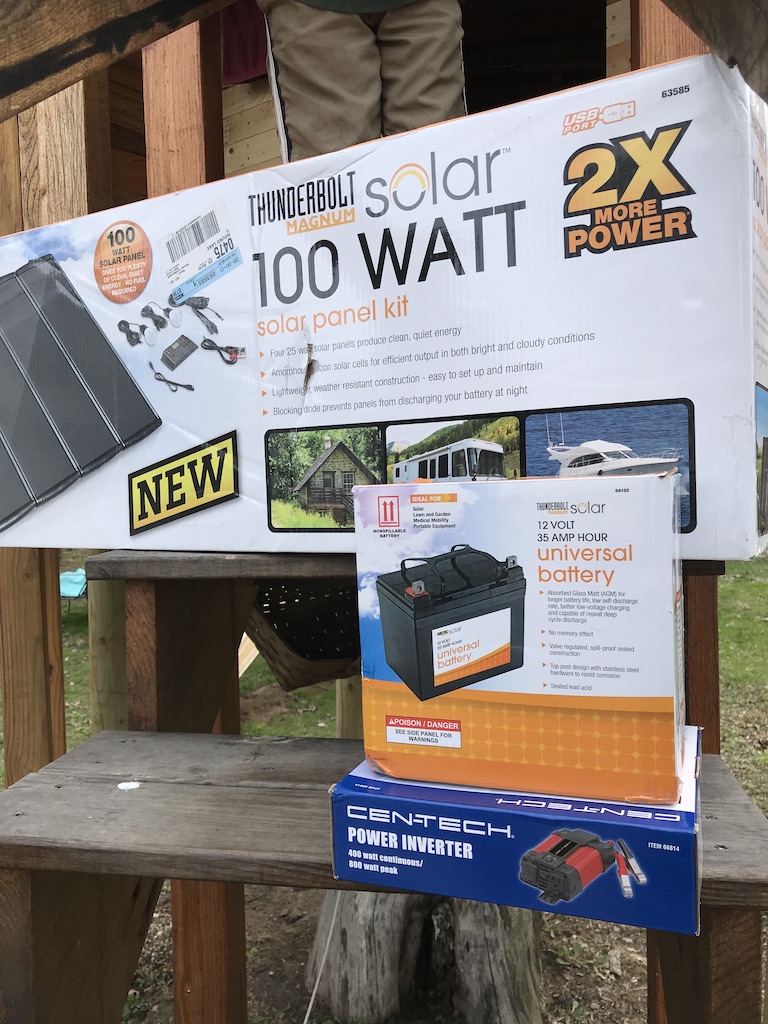
This was the perfect solution for our needs. The kit included (4) 25 watt solar panels, a solar control panel, wire harness, and two LED light bulbs. While I wasn’t even thinking of installing light bulbs, these turned out to be great and I’m delighted the kit included them.
In order to make this a functional setup, we also needed a battery and inverter. The image below shows the basic components used to setup our solar power system.
- 100 Watt Solar Panel Kit $149.99 (Harbor Freight)
- 12 Volt 35 Amp Battery $55.99 (Harbor Freight)
- 400 Watt Power Inverter $29.99 (Harbor Freight)
Total $235.97
In order to get a functional solar power setup, I could have stopped here. But in order to make this work for our particular setup and layout, I felt we needed additional items.
Since I was new at this, I simply started with the basics. It took a lot of trial and error to figure out exactly where I wanted everything. In addition I also needed to setup the fan in order to gage how long the power cable was in order to plan where to place everything. Does that make sense?
At first these were the only three components I purchased. But once I figured out it was going to take more planning, parts and funds, I put off the complete install until I had everything I needed and wanted for our setup.
Materials
The solar panels are the focus of this article. However, there were other items we added to improve the overall setup.
For instance, the cables that came with the inverter were not long enough to install it where I wanted. After reading the manual I realized I could use longer cables to safely install it a farther distance from the battery. I went shopping online and purchased cables and waited for those to arrive. Here is a picture of the longer cables I purchased . Turns out I didn’t need the alligator clips since I just screwed the cables directly to the battery and inverter.
I needed a weather-proof box for the solar control panel. I purchased one weather-proof case to hold this equipment. But again, this meant ordering it and then waiting for it to arrive before we could continue with the setup.
I wanted the inverter on a different wall farther away from where the battery was located. This meant I needed another weather-proof box along with the longer cables. I ordered another weather-proof box online and waited again for this to arrive to continue.


The battery also needed a home, so I purchased a marine battery box to store and protect the battery. I ordered it and waited yet again for that to arrive.

Although the inverter was in a location on the wall that made this more convenient I also purchased longer 10ft power cables to use with the iPad and phone. The longer cables makes it easier to move around while still using the devices.

The point of this section is this; just purchasing a solar panel kit will only get you so far. In order to make this solution work for our treehouse project, I needed to purchase additional parts. In addition, depending on where you install the panels will also dictate where you physically place everything. This requires more planning, more parts, more funds and more time. Gee, that sounds oddly like the triple constraints taught in project management, now I’m starting to sound like a project manager.
Here is a list of the additional parts I purchased.
- Large battery box $10.75 (Amazon)
- 10Ft 4 AWG Black & Red cables $58.00 (Amazon)
- 10Ft USB cables $10.89 (Amazon)
- Velcro to secure the inverter inside the weather-proof box $5.36 (Amazon)
- 2 Weather proof electrical boxes (Amazon), on for the control panel, one for the inverter. $34.00 (Amazon)
Material/Parts Total: $119.00
Solar Panels: $235.97
Daddy contractor fee: Priceless!!
Grand Total: $354.97
Here is the heavy duty velcro I purchased. I used this to secure the inverted inside the weather-proof box.

Installing the Panels
Installing the panels was straightforward, I used a very long ladder and secured each panel to the roof. The kid was supervising me while I was making sure I had them centered; daddy to the left, no, no, no more that way. Ok that’s perfect. Wait!!! how did my son get to be my supervisor?
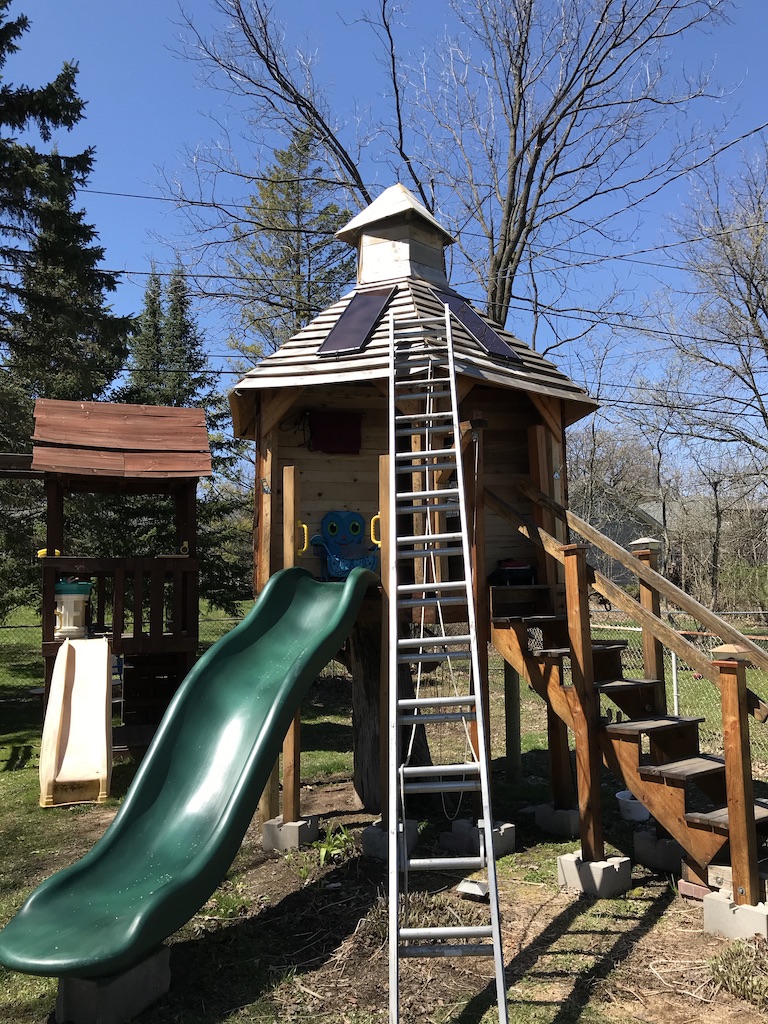
Once the panels were up, I drilled holes to run the cables through the roof shingles.
The next challenge was to figure out where to install the control panel and weather-proof box. The cables were long enough from the solar panels to the control box. But the cables from the control box to the battery on the floor was not. These are some of the challenges to work though setting this up.
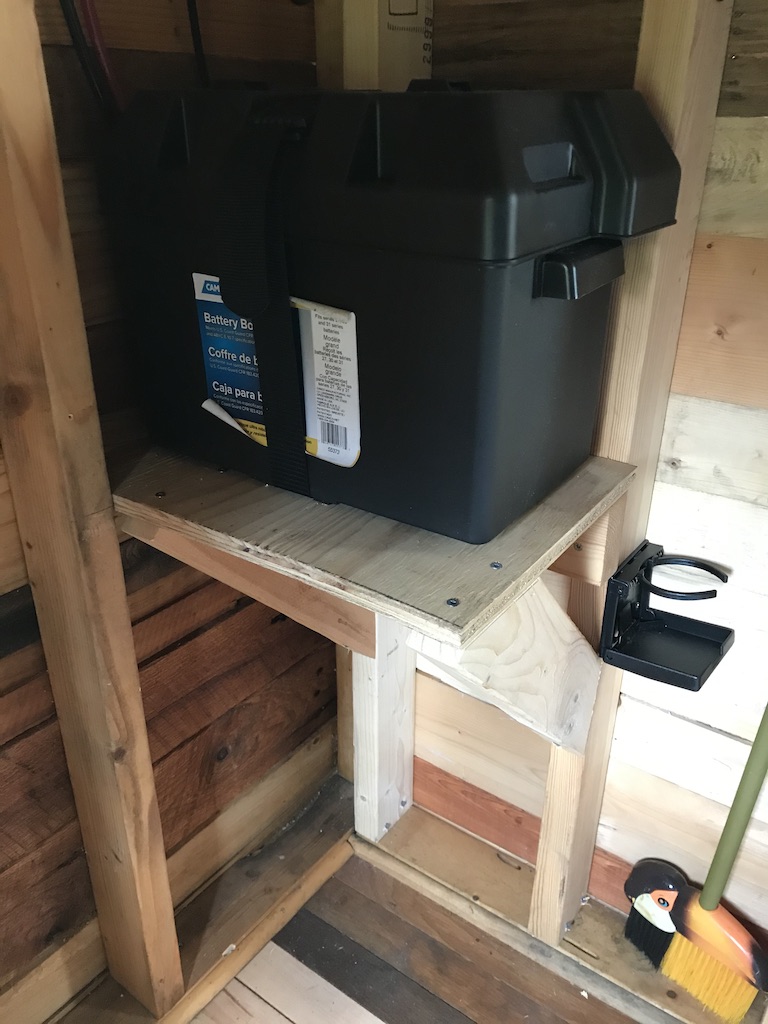
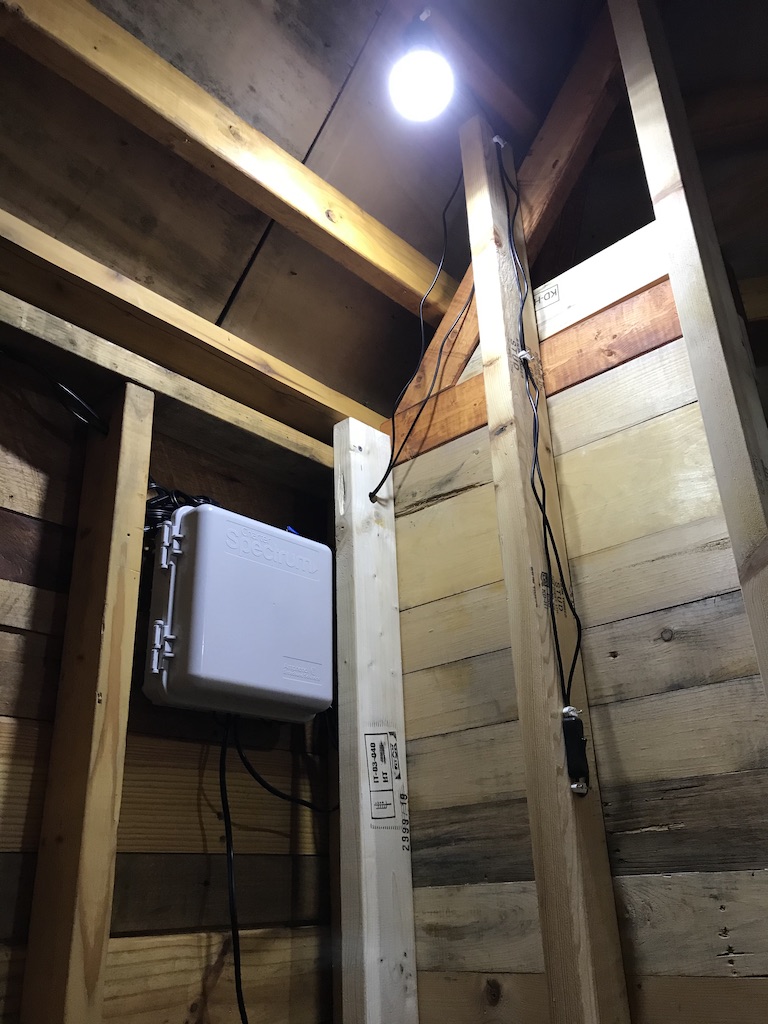
In order to work with the cable lengths and our setup, I ended up building a shelf to hold the battery. Building the shelf allowed me to bring the physical battery up off the floor and, closer to the solar control panel. The image below shows the shelf and battery setup. An addition benefit to having the shelf, is that it also provided a way to secure the battery box so it does not move around.
The image below shows the solar control panel installed in the weather-proof box and cables.
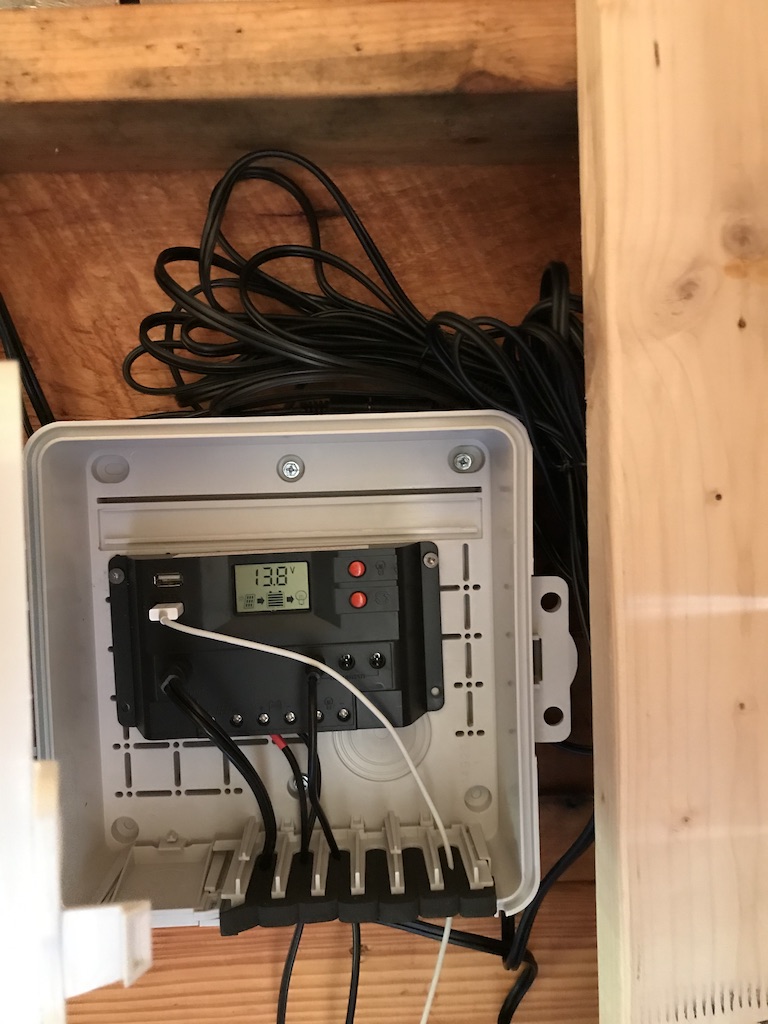
Running the cables and setting up the light bulbs. The lights are great and come with a wall switch to turn them on and off. I had never planned on installing lights like this, but since they came with the kit, this was perfect. We have one light on each side of the room.
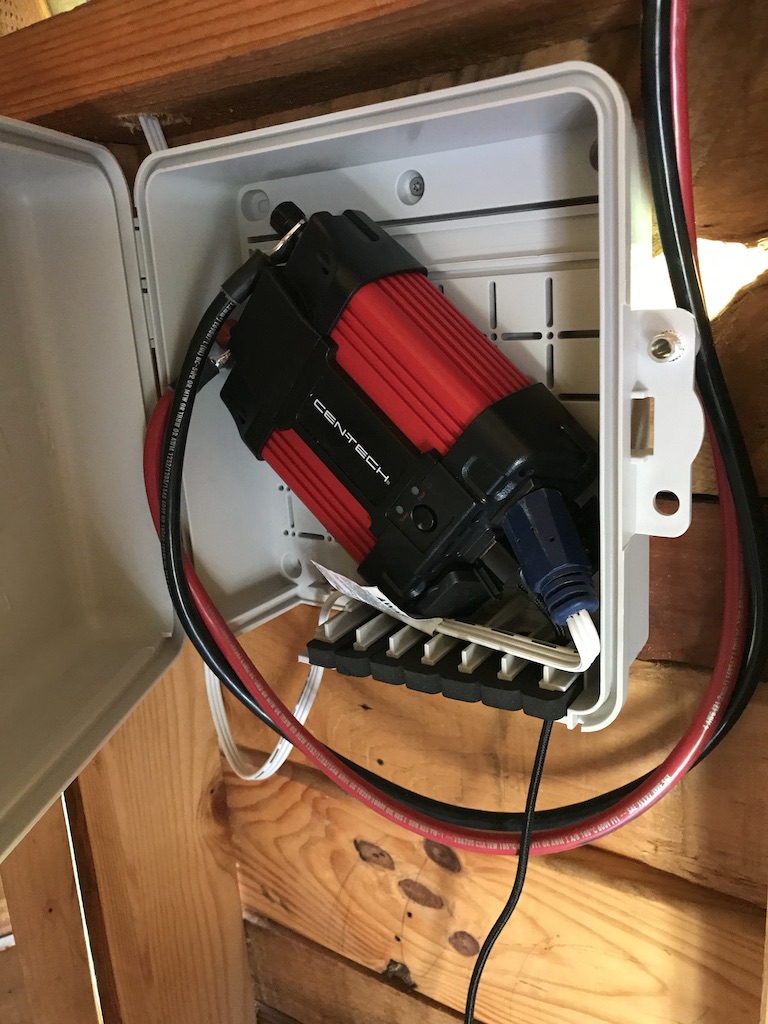
The image here shows the second weather-proof box and where the inverted is installed. The cables string around the top of the wall and run under the box into the enclosure. This particular box also comes with openings on the bottom for larger cables as shown.
As you can see from the image, it just fits inside the box. I didn’t take into account the size of the plug from the fan. This meant we had to angle the inverter inside the box. I used heavy duty velcro to secure it.
The reason I wanted the inverter towards the center of the room is there is a power button that needs to be turned on when using it. If I were to install the it tucked away in a corner closer to the battery, it would be difficult to use.
What I learned
Simply purchasing a solar panel kit is easy. What I learned is making the kit work for your particular project adds more planning, cost and time. For instance, I only purchased one weather-proof box for the control panel. Once I figure out I needed the inverter 10ft away on a different wall, I purchased a second weather-proof box.
Lesson learned, I ended up building a shelf to hold the battery box. Making all this equipment “fit” our project cost more money, but it also meant a lot of trial and error. Building a shelf for the battery, running the cables only to realize, it didn’t work and then needing to re-run them again etc.
Lesson learned, in hindsight I wish I would have drilled the holes directly below the shingles to keep the water out. Lando and I sat outside on the porch section while it was raining one day. We noticed the water would run down the cable, through the hole from the roof inside, and drip on the floor. If I spent more time planning where the cables ran, I would have set them up under the shingles or under the panels to shield them from the rain.
Lesson learned, I think I spent too much for longer cables. $58. for red and black cables I felt was expensive. I was guided by what was listed in the inverter manual and it specified 4 AWG cables so that is what I purchased. I also found a pair on Amazon that already had one end of the cables crimped and the other had large alligator clips. I may have been able to purchase cables cheaper by the foot and added the connections myself. Now I’m left with legator clips I don’t need.
Updates
The treehouse has solar power. Lando is able to watch movies on his iPad without having to worry about the battery dying. We have a ceiling fan to keep us cool and keep the mosquitos away in the summer. Daddy can charge his phone and not have to run back to the house. Daddy can also run the cappuccino maker, LOL, just kidding that’s silly!
Up next is to figure out a screen door solution for the larger openings by the starts and slide. The idea is to be able to sit on the patio and not be eaten alive by mosquitoes.
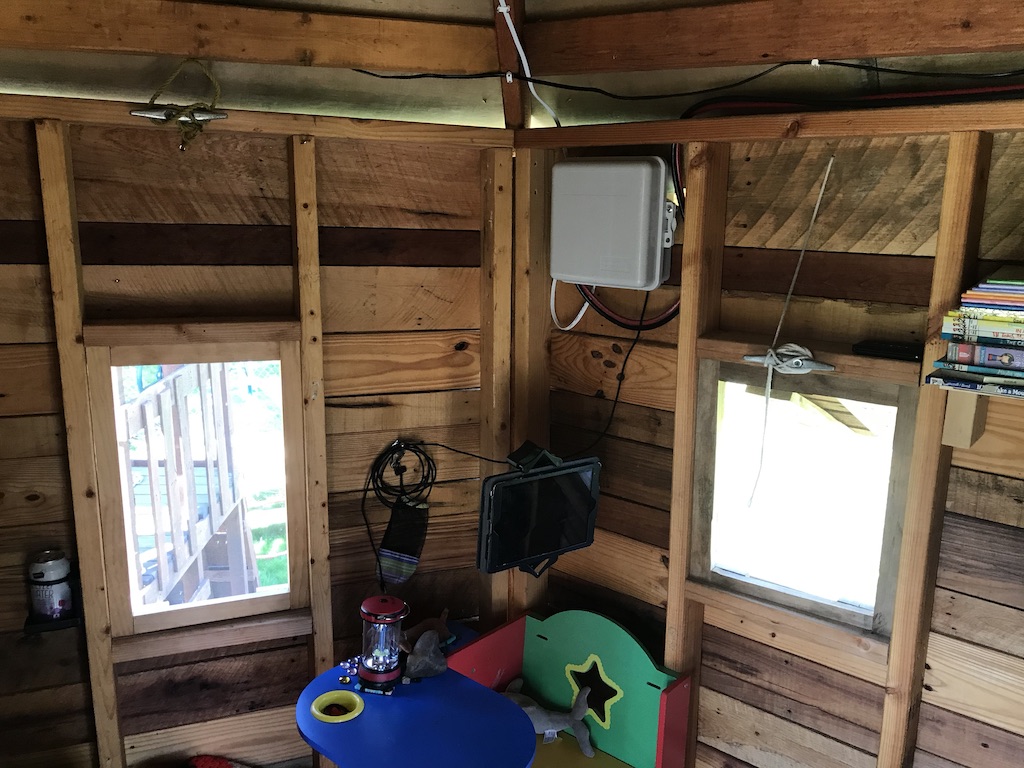
The image below shows the location of the box for the inverter. The white cable from the top is the power cable for the ceiling fan. This plugs into the inverter. The red and black cable run to the battery on the far wall to the right. The coiled up power cable for the iPad runs directly to the inverter and is long enough to stretch to the bean bag chairs on either side of the room.

What can you do?
- Part Seventeen
- Part Fifteen
- Comment below, Even if it is just to check in and say Hello. I look forward to hearing from you.
- Share this article with your family and friends.
- Sign up for our newsletter.
Follow me on Twitter, pin me on Pinterest, or watch me on Instagram.
Thank you,
Dave
Look mommy, our treehouse has air conditioning.