
Goal: to add a climbing wall to our existing playset.
Have you ever shopped for a kids out-door play set before? Well, now that my son is three, I decided to see how much these things cost.
Yes, I had sticker shock when I started looking around. Even the options online were not much cheaper.
There is no way I was going to spend hundreds or even thousands of dollars for one. The way I figured it, I could make one of these for a whole lot less money. And besides it gives me something to build. I like building things, did I mention that?
If you are just joining us, I created an article series for this project. You may want to start with part one, Do-it-yourself (DIY) Kids Out Door Playset – Part One, The Project
You are reading part three, which talks about building the climbing wall addition to the playset.
Playset climbing wall hardware
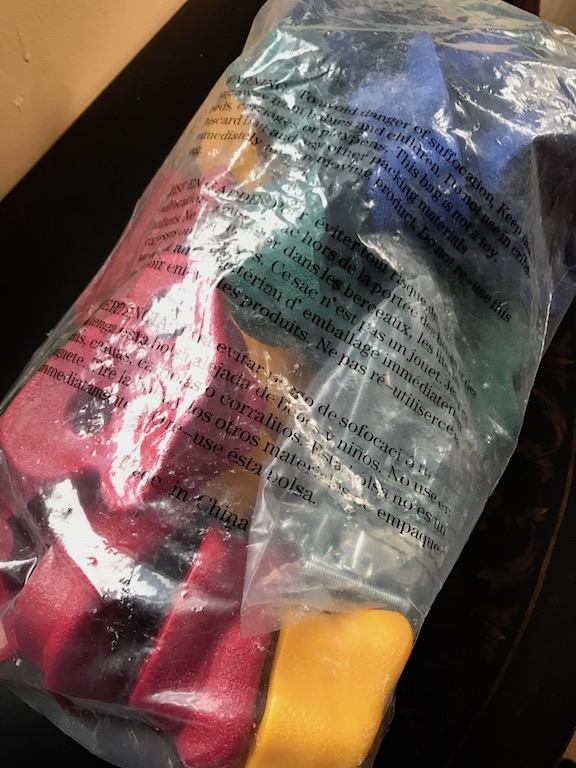
For my son’s third birthday Grandpa & Grandma purchased the, JGS 20 Deluxe Large Rock Climbing Holds for Kids with Longer 2″ Mounting Hardware for Wood Playset Swing Set, Indoor Outdoor Climbing Wall, Children Playground (eBook Install Guide Included) from Amazon. Thanks grandpa and grandma. No money out of my pocket for the climbing holds. Yeah!
Playset climbing wall lumber
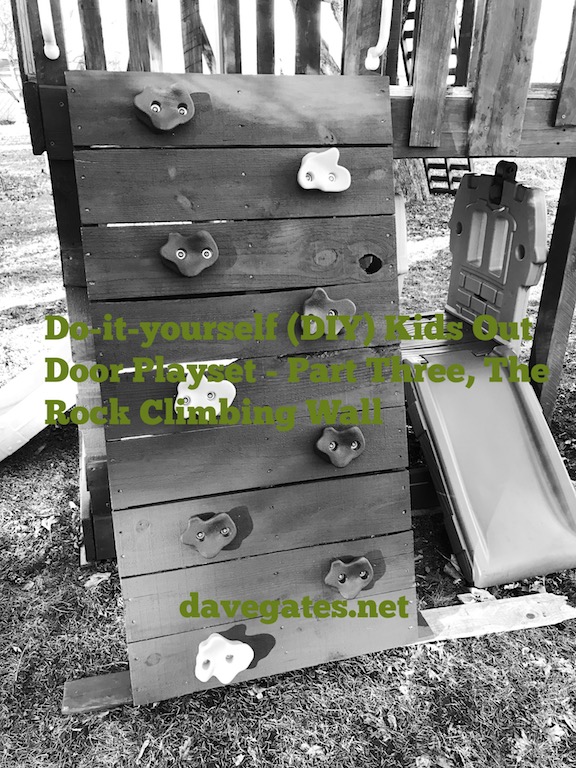
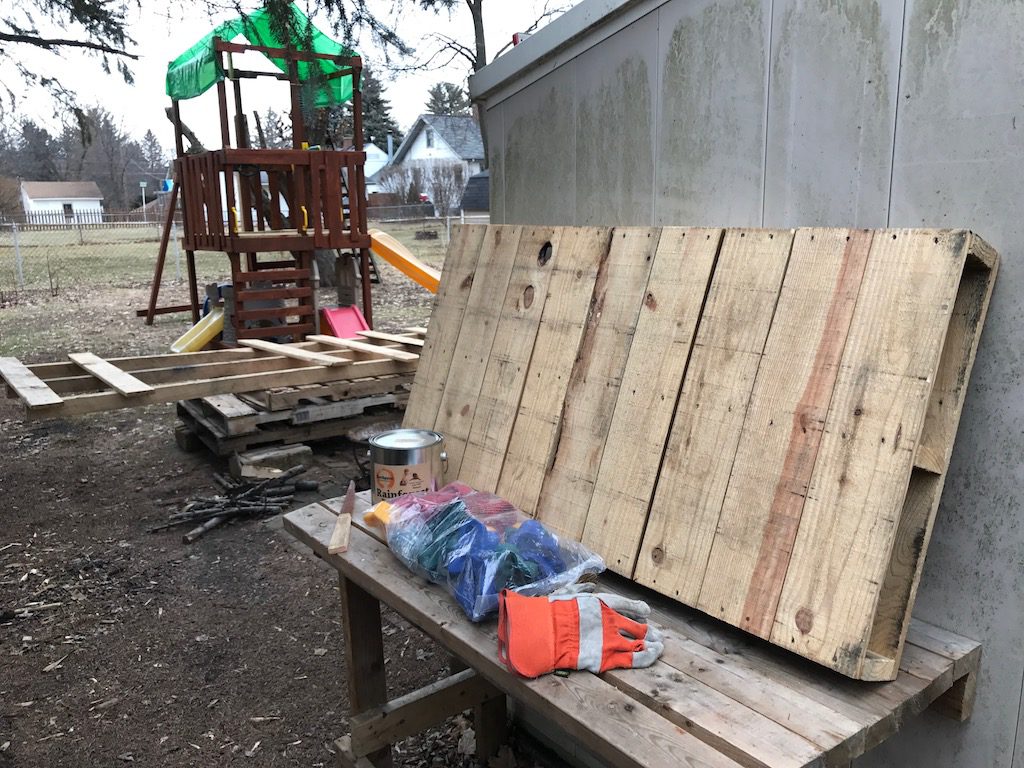
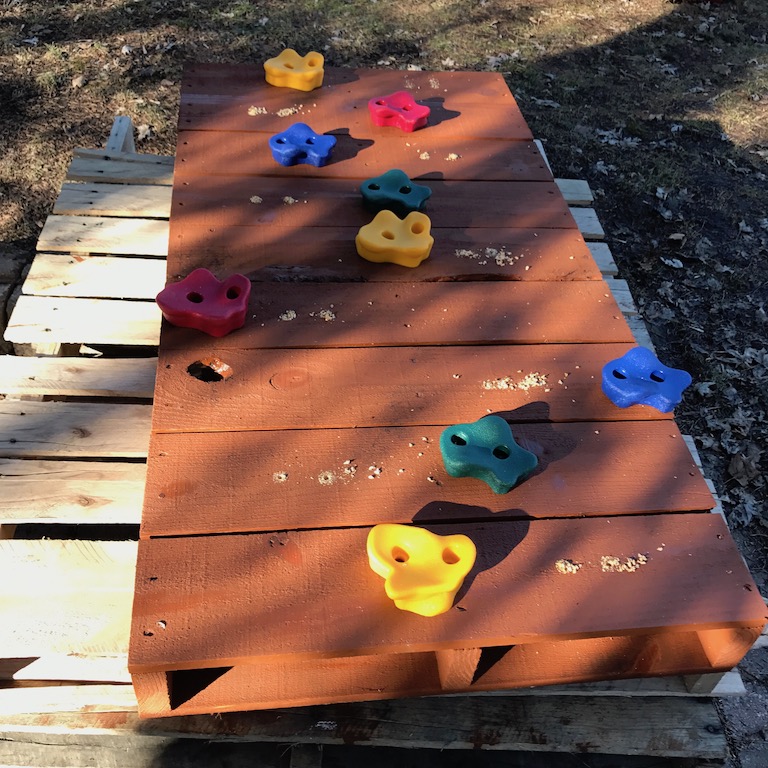
FREE!! In keeping with the free lumber theme, I pulled another pallet from the trash at my day job. It is the perfect size for the climbing wall addition.
This particular pallet measures about 26 inches wide by 51 inches tall. I like that it didn’t have space between the boards which made this a solid wall and perfect for a climbing wall.

The fact that I didn’t need to actually cut or assemble any wood was a bonus. This saved a bunch of time and I was able to complete this in one day.
Tools for the playset climbing wall
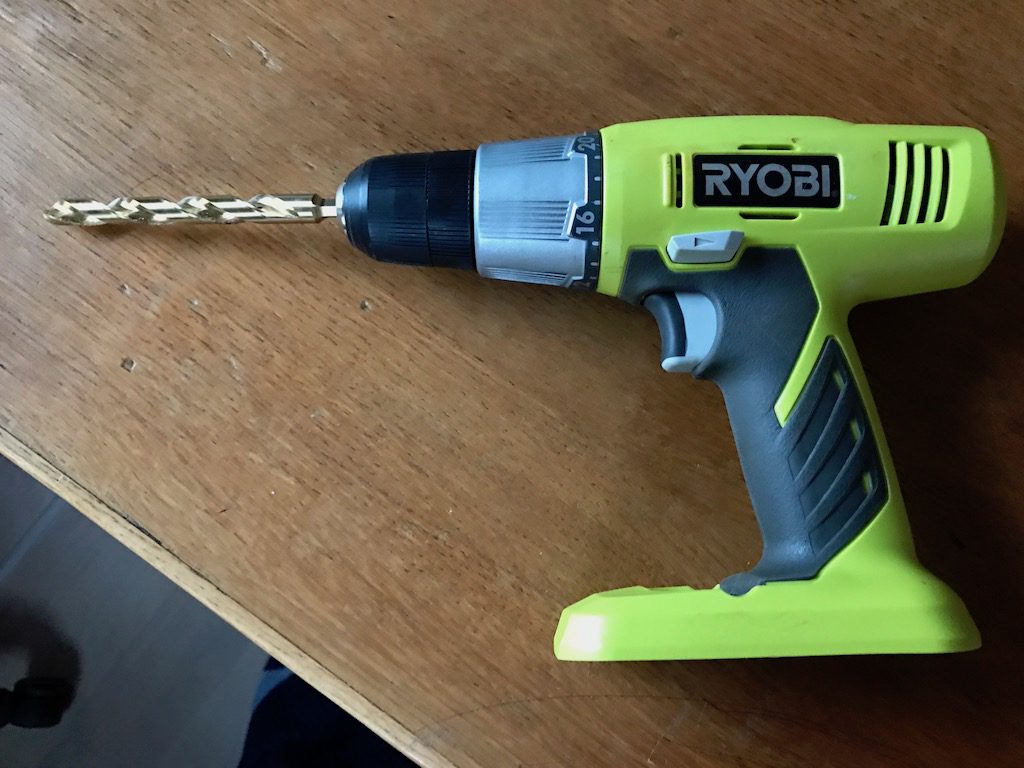
Cordless drill – Ryobi Cordless drill
– This was used to drill the holes in the pallet for the climbing holds.
Impact driver – Ryobi impact driver
– Used to secure the wall to the existing tower frame. I used the 3 1//4 Spax screws I had left over as discussed in article two, building the tower.
7/16 drill bit
– The manufacture of the climbing holds recommends in their directions to pre-drill 7/16 holds for the lock nuts.
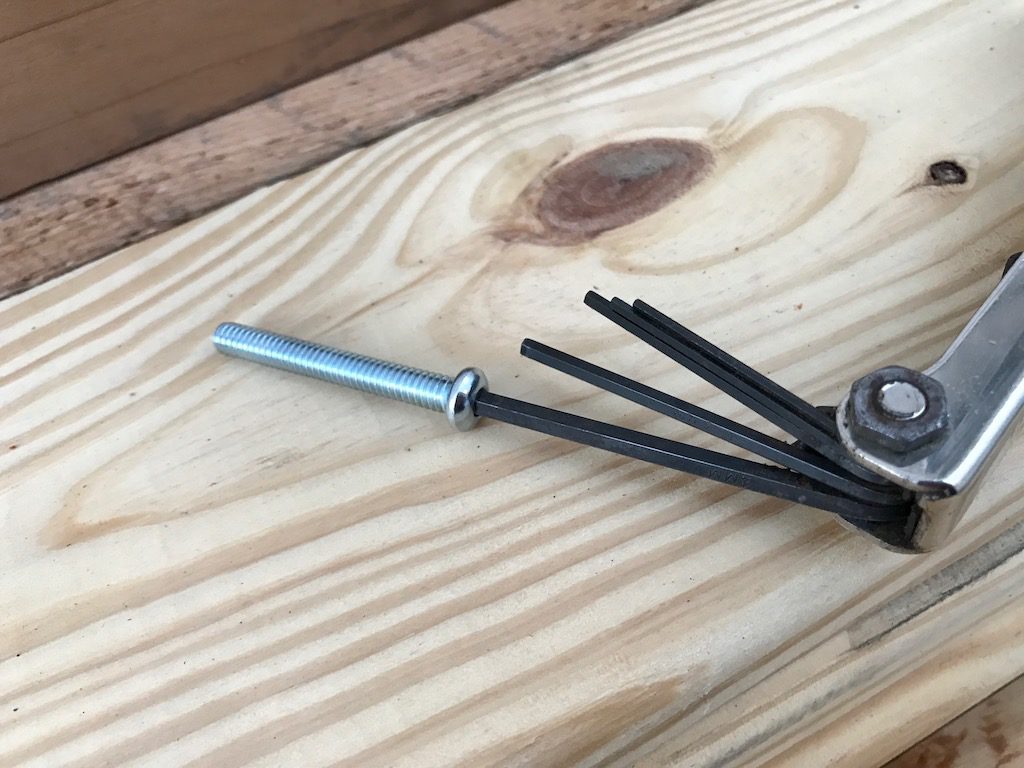
Allen Wrench
– Since the holds did NOT come with an Allen wrench I had to dig mine out. The screws have an Allen head, not your typical Philips or slotted head.
Paint Brush
– Used to stain the pallet.
Building the playset climbing wall
I started by staining the pallet. If you recall from the previous articles, I decided to go with an environmentally friendly stain.
I choose a product from EarthPaint called Rainforest Sealer which you can see in the image below.
We lucked out in February of this year (2017) with some amazing warm weather. It got up to the 50’s and was perfect weather to work outside.

After staining, I laid out where the holds should be. Do not drill anything at this time.
Just lay them out and get an idea of where the holds should be.

After I had a good idea where I wanted the rock holds placed, I drilled the holes.
Here’s the Ryobi cordless drill I’ve been talking about in this article series. He finally wanted to make an appearance, even with-out his rechargeable battery.
The directions called for 7/16 drill bit. I didn’t have one of these so I had to head over to my local Menards to purchase one.
Once the holes were drilled, I started securing the holds to the pallet.
The bag of holds included instructions on the installation of the holds. Please refer to the instructions for the exact requirements for your project.
I’m merely showing how I went about my project. Your rock holds and requirements may be different.
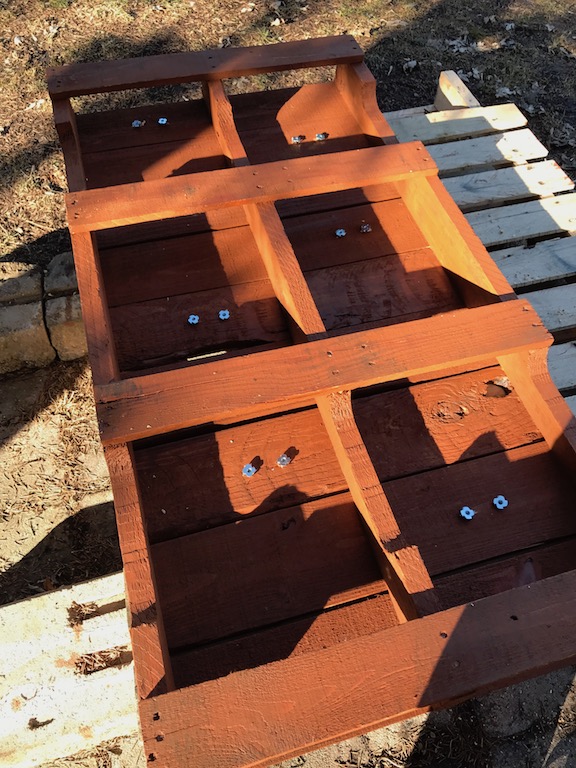
As you can see here, I’ve turned the pallet over and have inserted the lock nuts. The nuts should be inserted from the back and the screws from the front.
It is easier to do theses one at a time rather than putting them in all at once as I did.
I kept having to turn over and move the pallet, in doing this some nuts fell out. It’s just easier to do them one at a time.
Once the nuts are in you can turn over the pallet and start the screws.
The holds we have require a washer and Allen wrench to tighten them. Insert screws and washers per your manufacturers instructions.
Here is what the actual holds and hardware look like.
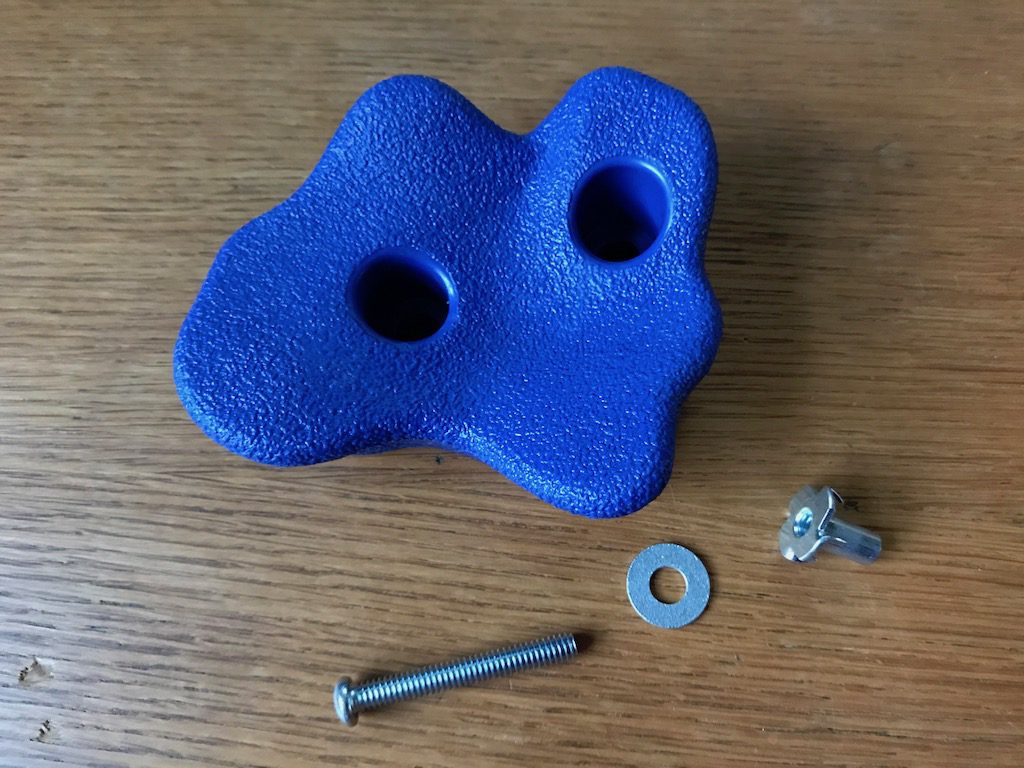
It’s interesting to note the holds we purchased did NOT come with an Allen wrench. I had to dig mine out.
After all when you purchase furniture or other DIY stuff they usually come with the correct sized wrench, but this did not. Luckily I had one that fit.
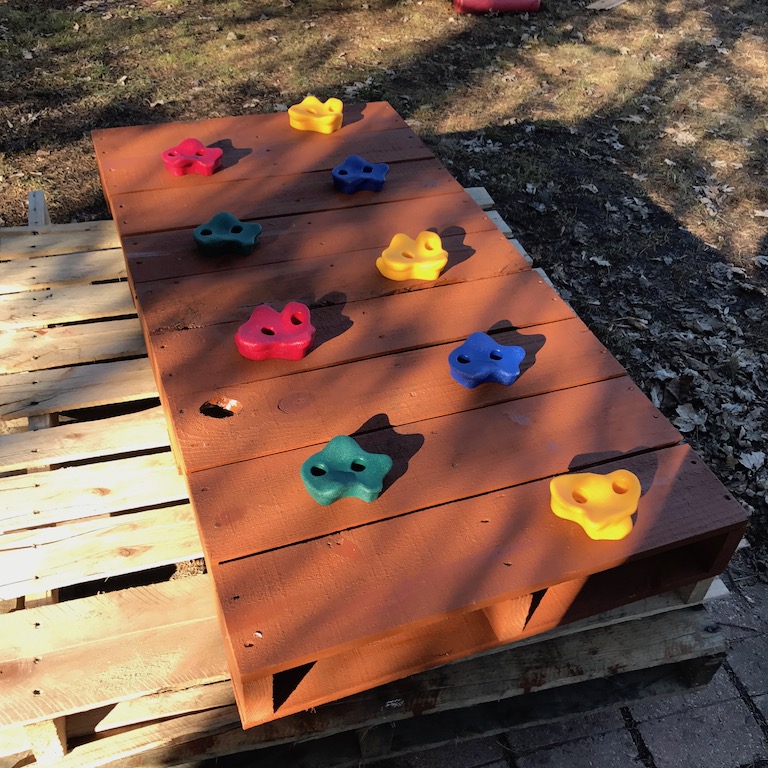
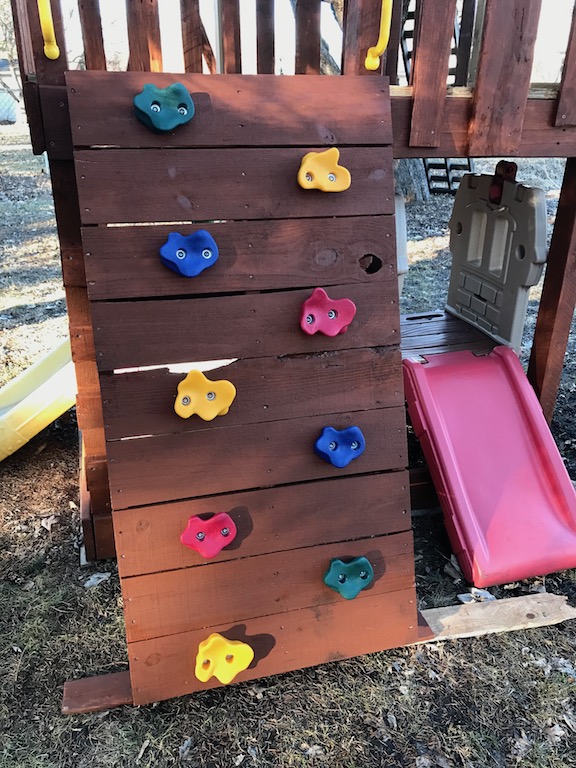
For our climbing wall, I ended up using 9 holds. If the kid out grows this wall, I may need a bigger one so I’ll hold onto them for now.
Playset climbing wall material list
- Lumber, FREE, re-claimed pallet from local business. No money out-of-pocket.
- 20 rock climbing holds, Grandpa & Grandma purchased these for my sons 3rd birthday.
- Construction screws to hold the wall to the tower. I had left over screws from building the tower.
- $8.92 (7/16) Titanium hex shank drill bit purchased from Menards.
- $99.95 Environmentally friendly stain. Purchased online from EarthPaint. I purchased a full gallon which will be used for the remainder of the project.
Not including the stain I have about $9.00 into this project. My time of course is priceless!!!
Here is the finished climbing wall.
Lesson learned building a playset climbing wall
I initially tried to start the screw from the front to attach the wall to the tower. This ended up being an awkward angle and I ended up stripping the hex head on the screw. I had to use pliers to manually remove this screw.

After analyzing the situation again, I realized it would be much easier to secure the pallet to the tower from the inside. Duh!!!
There is plenty of room to start the screws from behind the 1 x 6’s just under the floor. Since I had the l longer 3 1/4 inch screws, this worked perfectly. Lesson learned. I hope it helps you. Next up!!
Part Four – Do-it-yourself (DIY) Kids Playset – Raising The Swing
Do-it-yourself (DIY) Kids Playset – Part Four, Raising The Swing
Have any further questions regarding this project? Please comment and share below.
Follow me on Twitter, or watch me on Instagram.
Looking for more DIY ideas? Sign up for our newsletter. I look forward to hearing from you.
Dave