What is this about and why?
Do you have a lot of stuff? Have you ever put any thought into the large open space below your bed? I know, I’ve always wanted to take advantage of the space under our bed. Recently my wife and I decided to find a solution. What we eventually settled on was to build our own under the mattress storage bed with the assistance of a do-it-yourself (DIY) kit we found online. The remainder of this article goes into the details of this project and how we adapted it to our needs.
Personally, I’ve searched online and in various stores for the “perfect storage bed” but was not completely satisfied with the options I found. The storage beds I did find were mostly bed frames with built-in drawers. We were not looking for additional dresser drawer type storage space, what we really need and wanted was to take advantage of the entire open space under the bed. We needed a solution for storing large and bulky items, which became our goal for this project.
After shopping around we discovered, there are some nice beds that fit our criteria, but most of them were expensive and not quite the right style or color. As a result we didn’t just want to spend money on something we both were not happy with. We decided that building our own storage bed would save us money, and if it didn’t turn out the way we wanted, then we wouldn’t have spent a ton on it.

One reason we need the large open space is to store bulky hiking equipment. Both my wife and I enjoy hiking and have a lot of bulky equipment. But where do you put all that hiking gear when you have limited space? Everything I read about storing tents, and sleeping bags talked about not keeping them compressed or in hot attics or humid basements. If you are not compressing the tents and sleeping bags for storage this type of equipment takes up a lot of space. I’ve heard of people who dedicate entire bedrooms or basements to store their gear. Between my wife and I we have several sleeping bags each and several tents that need a new home. The abundant amount of space under the bed is, in my opinion, underutilized, and the perfect place to store this type of hiking equipment.
Options – Buy or Build
At Lift&StorBeds you can purchase a pre-built bed or purchase the kit and build it yourself. If you decided to purchase the bed, you’ll pay $450 (Queen size). In addition to the cost of the bed you’ll also pay $350 for shipping. This sounds expense for shipping, but it’s a large item so I was not surprised. We decided the $350 could be used towards something else, plus there was a second option.
Lift&Storbeds, also offers a kit to build your own storage bed frame. The queen size kit cost $150 and $15 for shipping. To be honest I was a bit skeptical at first and was reluctant to start another project. After looking over their website and watching some videos, I was convinced this might not be too bad. Even after purchasing the wood and supplies, our cost was close what we would have paid in shipping alone if we purchased the bed outright. Some other considerations I had were, even if we did purchase the bed and had it shipped. What would happen if it was damaged, or broken, Not the fault of the company but large products do tend to get damaged more frequently in shipping. So if it did happen to get damaged when shipped, do you have to return it and pay shipping again? For such a large item and the high shipping charges, this just seemed unreasonable to me. So we decided to purchase the DIY kit and build the bed ourselves.
The remainder of this article describes how we built our storage bed frame. The material list and steps we followed differ slightly from the material list and steps outlined in the DIY kit we purchased. I’ve made notes here but also in the captions of the photos.
Solution: Purchase the DIY kit and build
My wife ordered the kit and before I knew it, I was at the local home improvement center buying sheets of 4 x 8 plywood to build this thing. The kit had arrived along with the instructions. After reading them over, I decided this might not be too bad, but we would need to make some modifications.
The first modification was the material. The instruction plans call for 1 inch thick particle board. My first thought was I really didn’t want to build it out of particle board. I’ve been down this particle board furniture road before. Items built out of this material eventually fall apart. If you decide to move the furniture at all or take it apart for any reason it just never seems to work properly. In my experience something always breaks, chips or cracks, when you attempt to move or put the furniture back together. We want our storage bed frame to be sturdy and to last, so we decided to use a more durable material like plywood. Changing the material was our first modification to the DIY storage bed frame Kit.
The second modification we made was re-enforcing the base frame . After concurring with the sales associate in the lumber department of our local home improvement center, we decided 3/4 inch plywood, as opposed to the 1 inch particle board the plans called for, was going to be adequate. The sales associate also mentioned if we really wanted to build in extra thickness we could always add extra 2×4’s to the inside frame. This was a brilliant idea however, instead of the 1×4’s we ended up buying 2×4’s to re-enforce the base of the frame. Since we changed from 1 inch particle board to 3/4 inch plywood, we felt we needed some extra support and re-enforcing the corners and center support with 2×4’s seemed like an easy modification.
Measurements and wood
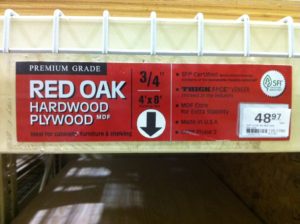
After calculating the sizes and wood required, I was lucky enough to get a sales associate to cut the 4×8 sheets of plywood to the dimensions we needed. This turned out to be a huge time saver, especially since I don’t have a table saw to accommodate the large and heavy 4×8 sheets. We choose 3/4 inch red oak hardwood top choice boards for our project. I really like the look and texture of the oak. I’ve used this in the past and was pleased in how well it takes a stain.
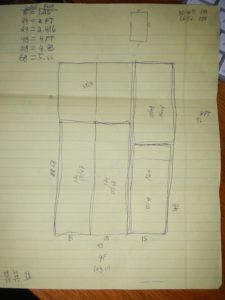
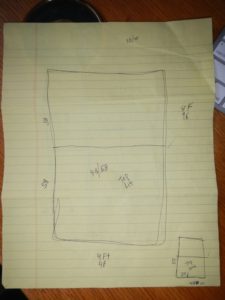
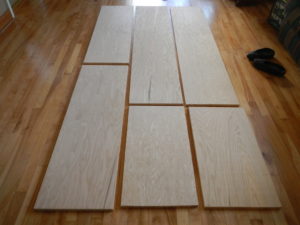
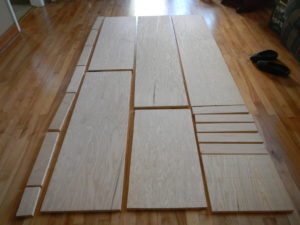
Here is a hint that will make your project easier. The Lift&Stor plans do not tell you how much wood to buy. As you can see from my hand written notes below, we needed to figure this out on our own. As it turns out in order to accommodate the size pieces the plan calls for, you will need three 4×8 sheets. I basically took the dimensions from the plans for each piece and attempted to arrange them on a 4×8 sheet. I treated it like a puzzle, at one point I actually took a piece of paper and cut out the sizes required. Then I tried to arrange them to fit on a 4×8 sheet. But after working every angle I could think of, I still ended up with three sheets. Yes, you will have some leftover pieces.
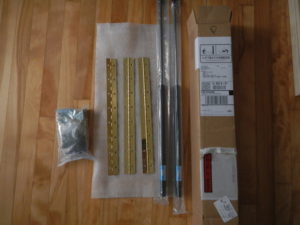
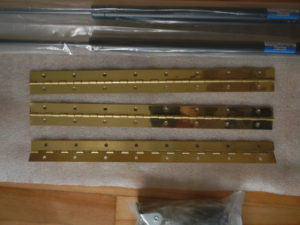
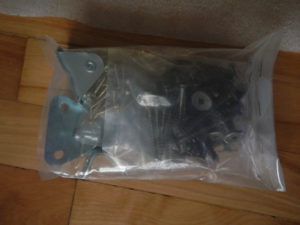
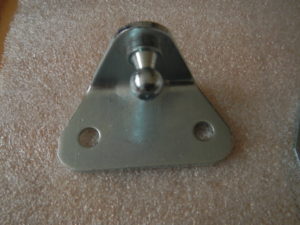
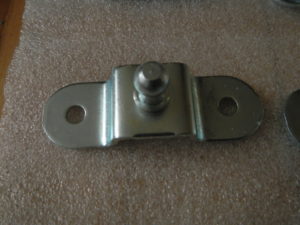
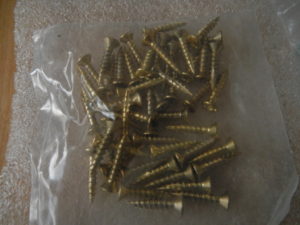
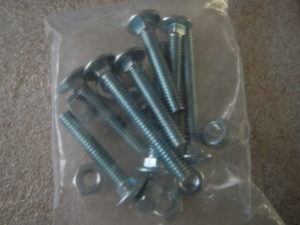
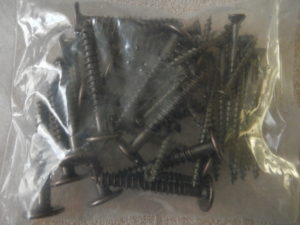
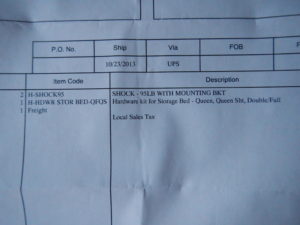
What’s included in the kit?
The following images show exactly what came with the kit. We did end up purchasing additional screws and larger bolts, but these are not shown. In fact I did not take a picture of them. I completely forgot to photograph the additional parts and tools we bought for this project. I’m sorry! but this is an amateur working here.

Getting the Material
This project will take three 4×8 foot sheets of plywood. If someone out there has a better idea how to arrange the pieces to only two sheets I’d love to hear how you did it. Please leave a comment below.
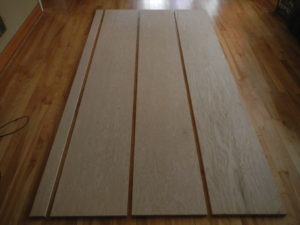
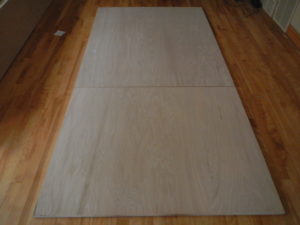
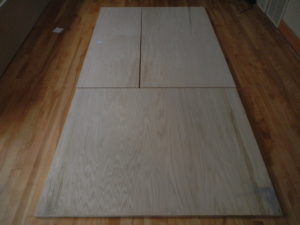
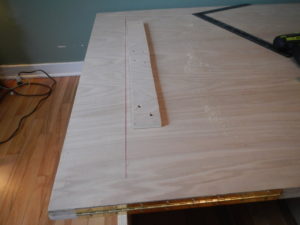
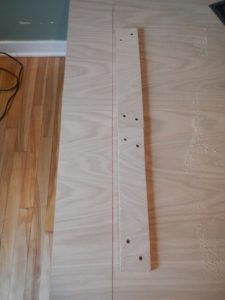
After getting the rough cuts from the store I was able to load up the wood a lot easier and transport home. Once I got the wood home I made more precise cuts for the sides of the frame. The additional smaller pieces you see are what we were planning on using to re-enforce the frame. We decided to scrape this idea and went with a more sturdy 2×4 to re-enforce the corners of the base frame. One 4×8 sheet was cut into two pieces, as shown above. This was for the top of the bed and was cut at the store. No additional cuts were needed for these two pieces.
Building the frame base
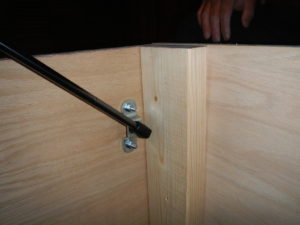
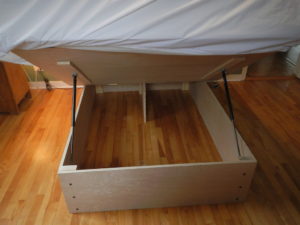
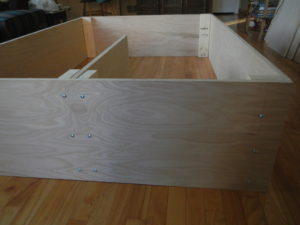
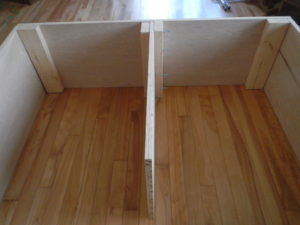
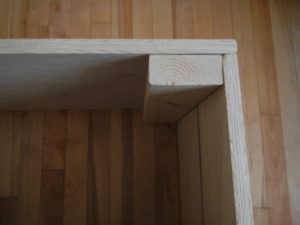
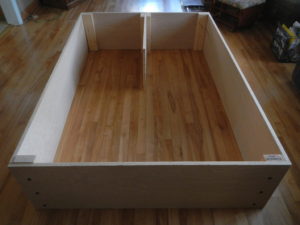
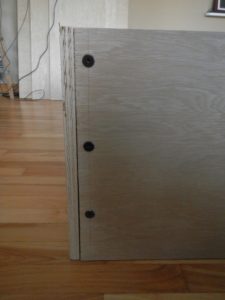
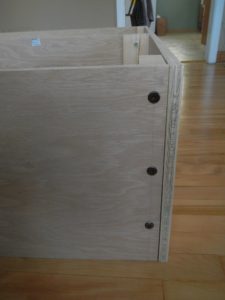
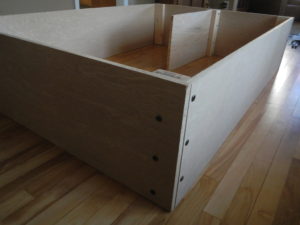
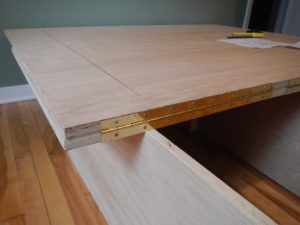
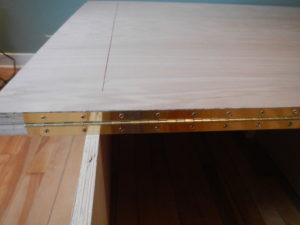
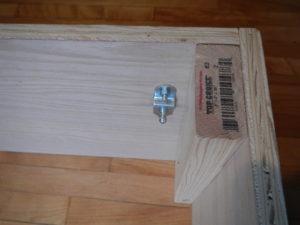
The images below show the completed frame with re-enforced 2×4 in the corners and center support piece. It’s important to note that the instructions call for 1 inch particle board. The hardware that is shipped in the DIY kit assumes you are using the 1 inch particle board so the length and number of screws in the hardware kit is different from what we used for our bed frame. We actually added more screws to the base of our frame.
Since we decided to go with re-enforced corners and center piece, we did purchase additional hardware. These few modifications are NOT included in the instructions. It was a minor change but we did need additional time in order to evaluate exactly how it was going to fit together. The images below show the additional screws we used on all four sides. The images also show the re-enforced center piece with additional 2×4 support.
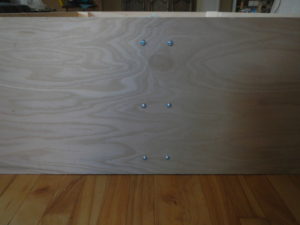

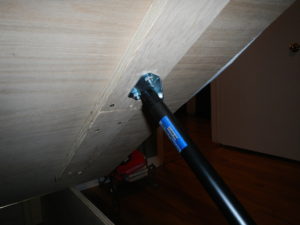
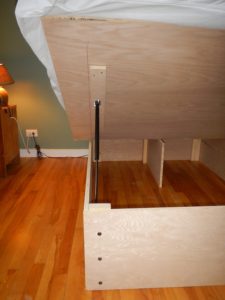
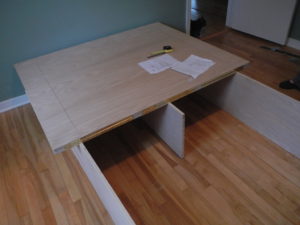
Building the top
After the base was completed it was time to clear out the existing mattress and box spring to make room for the new frame. My thinking was, I didn’t want to move this large bulky piece of furniture once it was all together. Once we had the base in place we started work on the top section of the bed. Although we were only dealing with two pieces for the top this was slightly more complicated since we had to adjust the placement of the shock mounts. The directions call for measurements right from the sides of the frame. Since we added 2×4’s to the inside of the frame our measurements did not align with the original instructions so we needed to make adjustments to install the shock mounts. See below for assembling the top section.
How much?
$149.95 Storage Bed Hardware Kit (Queen Size) from Lift&StorBeds.com
$15.00 shipping
$171.16 (3) sheets of 3/4 inch top choice oak hardwood plywood
$3.50 (1) 10 ft long 2×4 top choice lumber
$20.00 various drill bits and sockets
Total Project $359.61
Total if purchased pre made from website $799
Savings of $439.39
I want to hear from you. Have you built one of these before? What was your experience? What modifications or changes did you make? Did you paint or stain your bed frame? Please leave your comments below.
Thank you,
David & Jenny
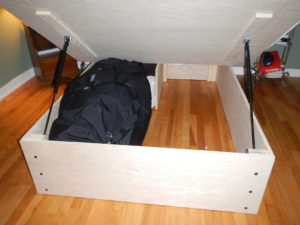
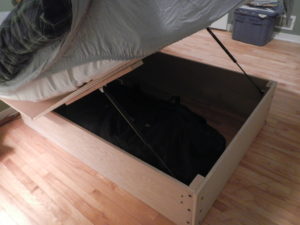
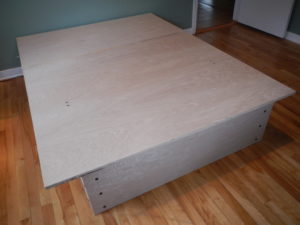
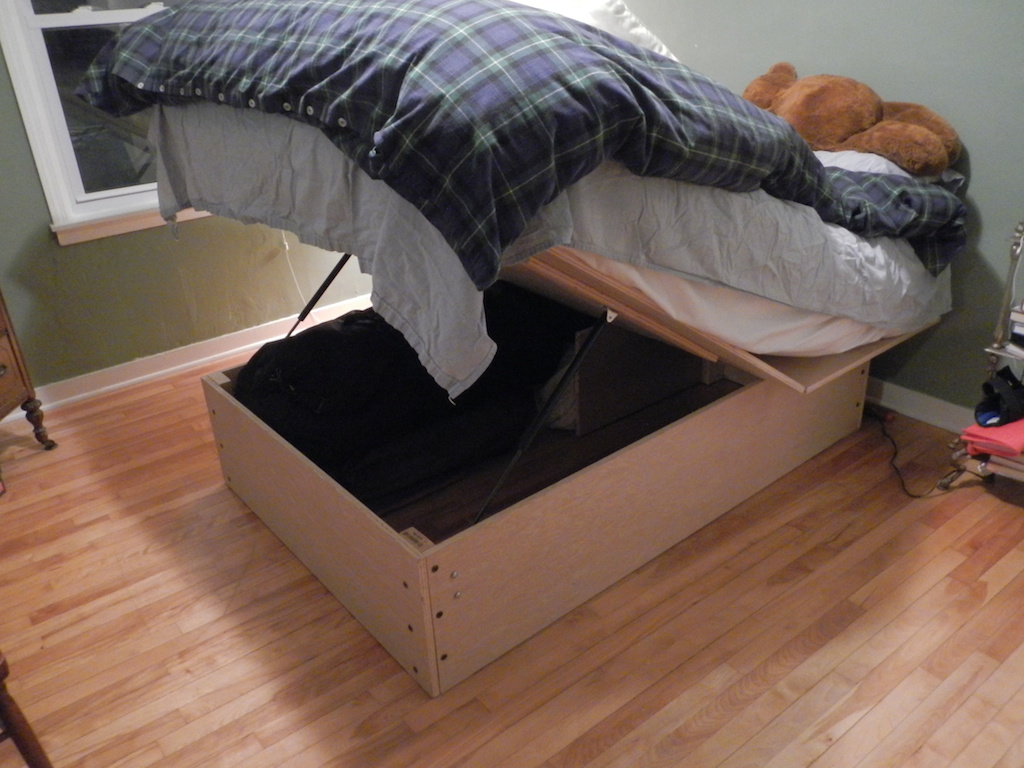
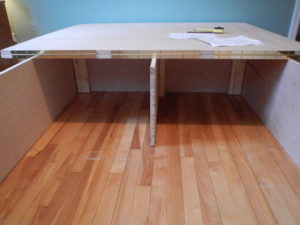
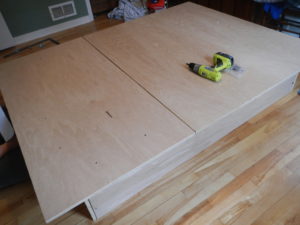
Completed storage bed frame
When we decided to build this is was late fall going on winter, with really cold and miserable weather in the Chicago-land area. Right now the wood is unfinished, our intention is to stain the bed, but that will have to wait as we need to do it outside or with the windows open. One thing I almost forget to mention is we also put heavy felt on all four corners. when you open the bed it tends to slide, since we have hardwood floors I didn’t want to scratch them.