 This is the third article in our tree house project. My plan this year is to build a tree house for my son. Click here to start from the beginning of this exciting project.
The idea is to build a hexagon shaped tree house. I’ve started the initial plans on paper, as you can tell from the images below.
I’m in the process of gathering materials and working with what I already have. My thinking is to build all the components first and then have a party and invite others over to put the thing together.
One of the challenges is designing this without knowing what materials will be available. Since I’ve been collecting materials for several years, I have a good starting point.
I imagine it will take all summer (2018) and fall to get the pieces built.
I’d love to get your feedback and comments. Please share this article with your friends and family.
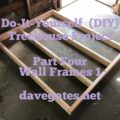
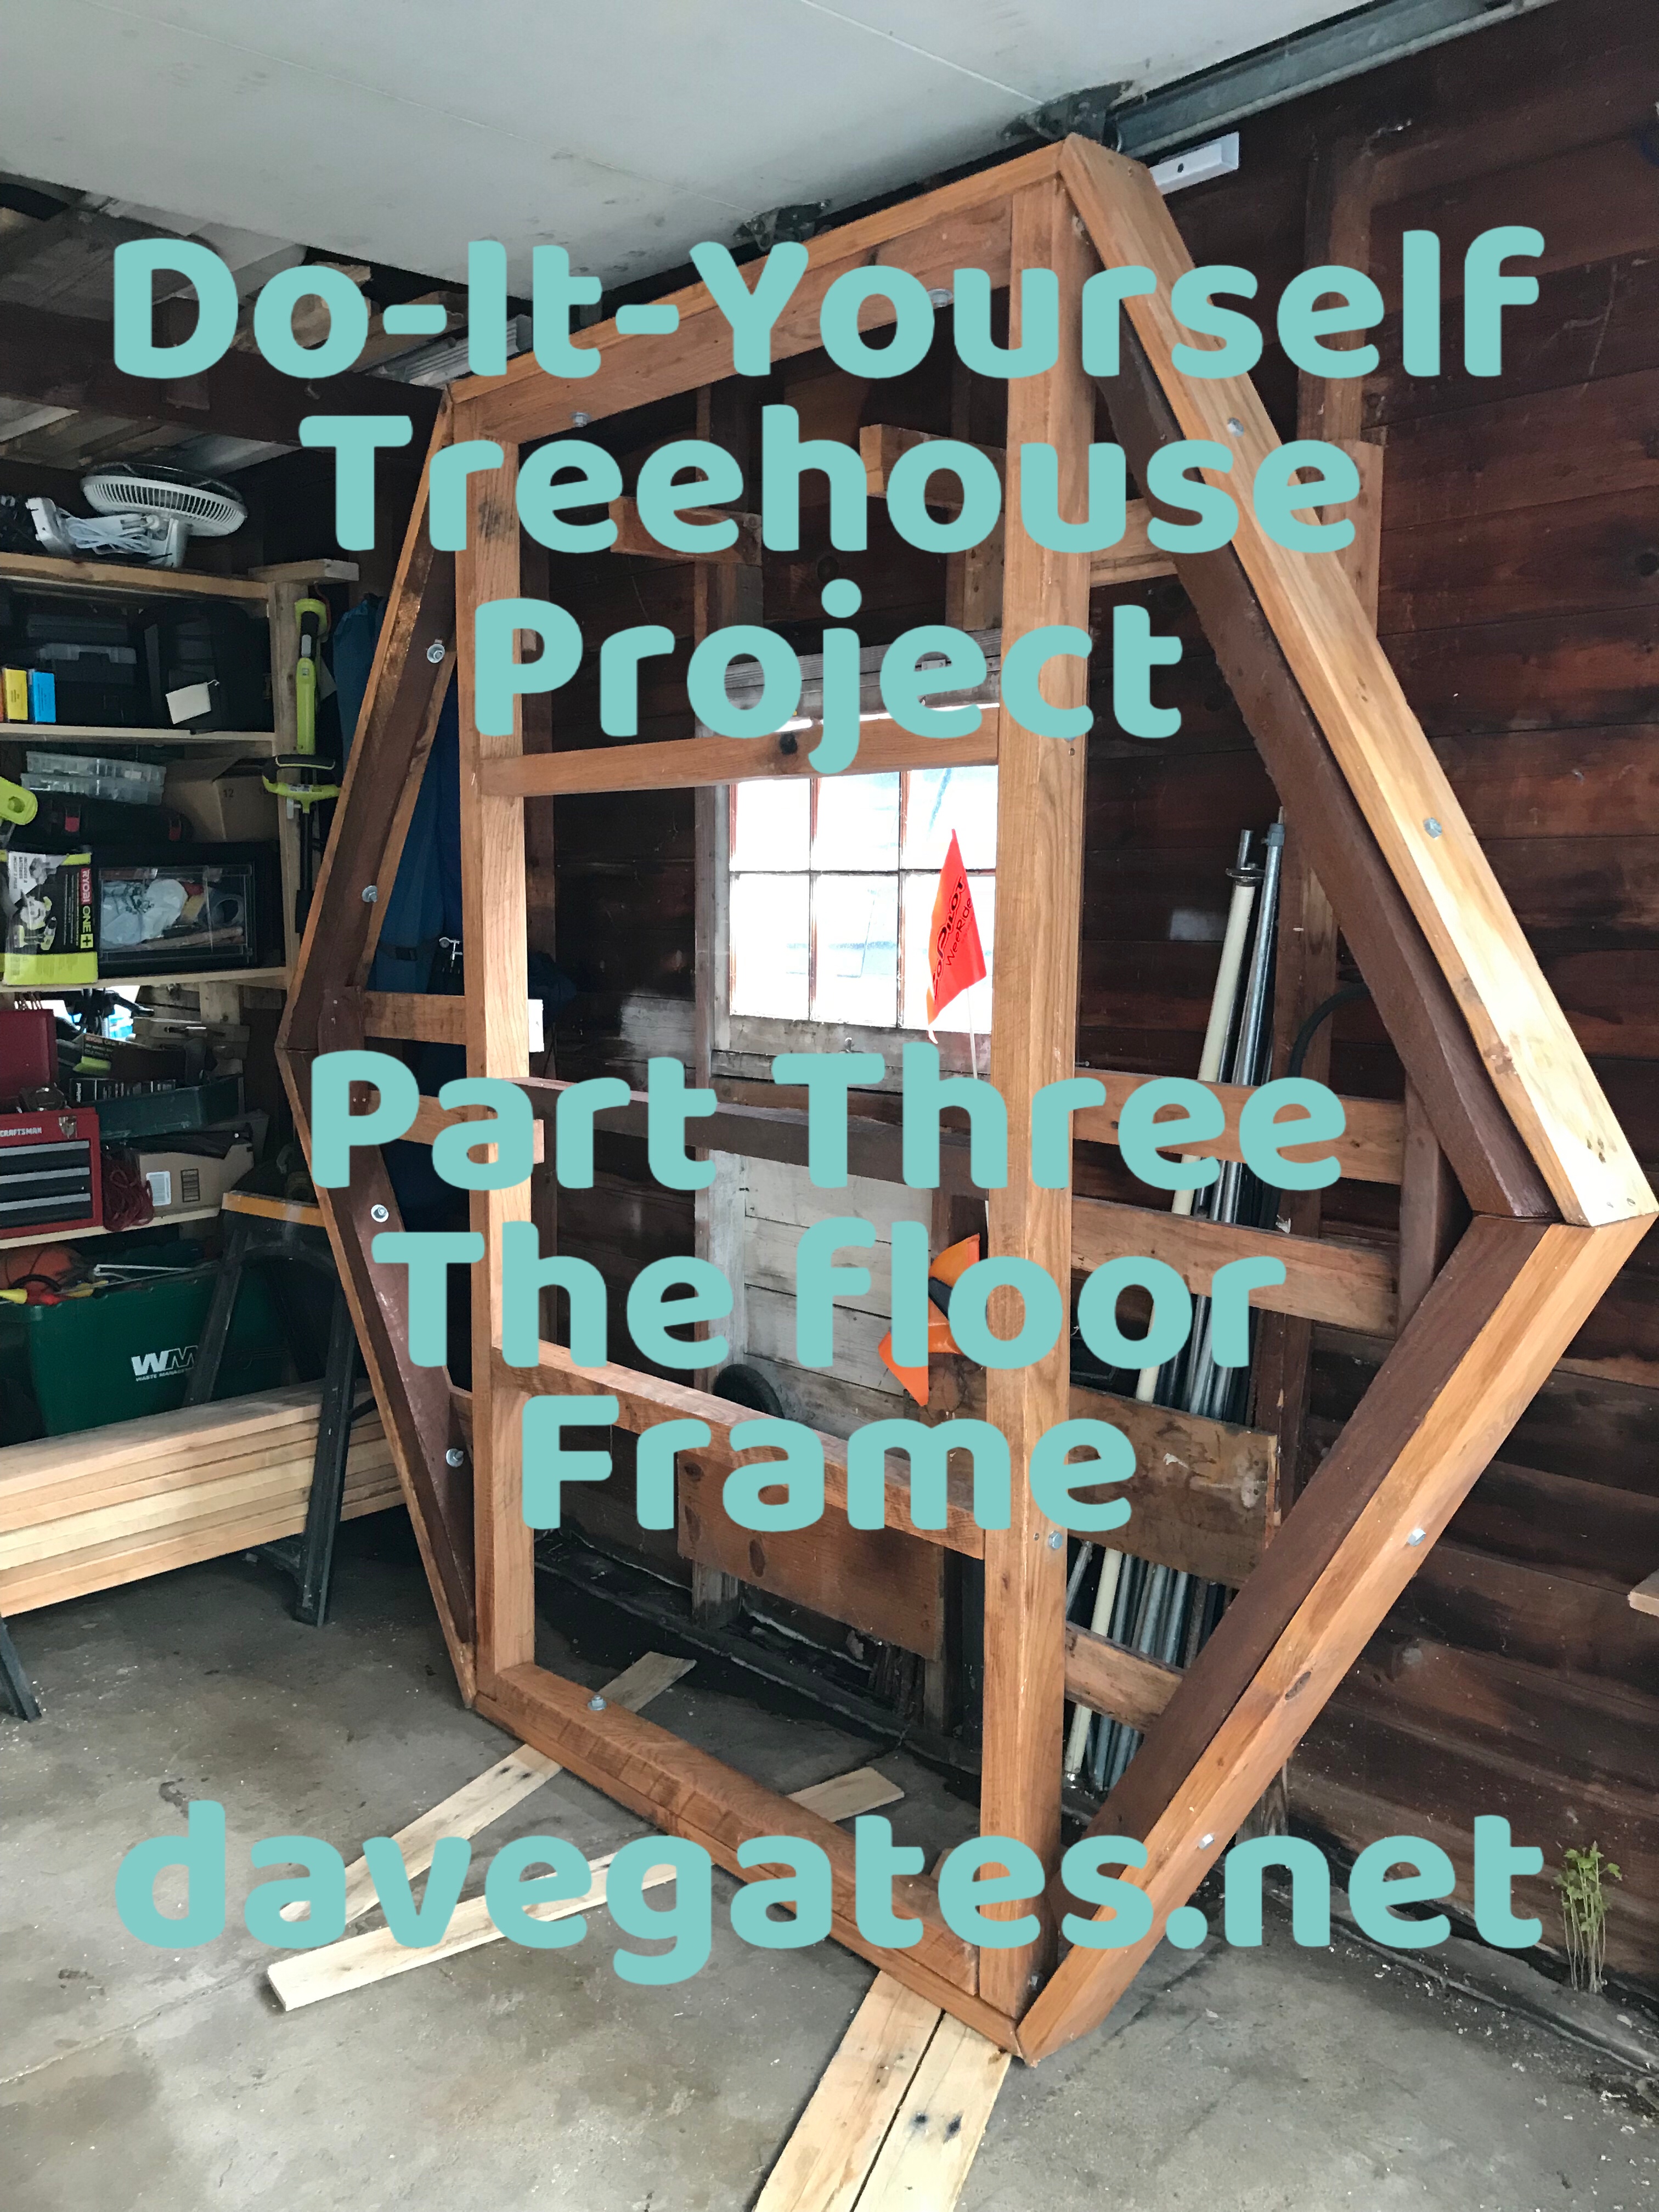
Floor Frame Plans
Now that we have the floor perimeter plans written up we can start looking at the floor frame plans.
The frame will consist of your basic rectangle shape as indicated in the image.

As you can see from the final image at the top of this article the design has changed dramatically. At first when I drew this up on paper it looked simple. However, after working with the wood and finding out just how heavy this was going to be, I needed to make adjustments to the plan.
The biggest change was adding more support to the triangle ends on either side of the main rectangle. After building the main rectangle, I quickly realized the ends needed more support. So I added more boards from the main rectangle section to the perimeter boards. I also added boards to stretch from the main rectangle to the triangle sides.
Once all that was done, I needed to stain the new lumber that was added. All these modifications took longer than I anticipated and now that the frame is complete, the entire frame is REALLY heavy.
The main boards are solid oak, as are most of the other support pieces. It is officially large and difficult to manage on my own. I’ve needed to ask the wife for assistance in lifting and moving it around in the garage several times while working on it.
Materials
- (2) 90 inch 4 x 3 boards, these are the large boards you see in the center of the image below.
- (5) 48 inch 4 x 3 boards, the darker board in the middle of the rectangle was also an addition.
- (4) 26 inch 4 x 2 boards, these extend from the rectangle to the perimeter corners.
- (4) 6 inch 4 x 2 boards, these also extend from the rectangle to the perimeter sides.
- (2) 6 inch 2 x 4 60 degree angle brackets for the corners.
- Large galvanized bolts to hold it all together.
- Hex Bolts and Hex screws, I used a combination of hex bolts and screws to hold this all together. 4 1/2 to 5 inches in length.
Here is what some of the frame parts looked like before I stained and assembled them.

Cost
The lumber for the frame was taken from discarded pallets from work. (FREE) It took some hard work to cut, sand and stain them, but for free materials I’m willing to do the work.
Lumber – Free
I did end up buying hex bolts and screws to hold this all together. I also needed to purchase drill bits to drill holes for the bolts. This includes the drill bits purchased to make holes for the bolts.
Hardware – $57.82
I had some stain left over from the play set project so I didn’t need to purchase any stain to touch up the additional boards added to the frame. I’m still happy and using Earth-Paint Rain forest Sealer. We have some Acorn Light and Cinnamon Stick color stain which is why you see two different color boards in the frame.
Cuts
Each board was cut to size. Since theses are rough cut boards that were re-purposed, we will need to measure and cut on site to exact dimensions. One of the challenges is using different sizes of lumber. So measuring will need to be watched closely. We are also using boards may not be entirely straight, so some adjustments are needed.
March 30, 2018
Since I had Good Friday off from the day job, I decided to devote my time to working on the frame.
I was able to measure and cut the boards. I also sanded each board. Since it is still relatively cold here in Chicago-Land I was not able to stain them.
I hope for warmer weather soon.
May 19, 2018 Update
The weather is still hit or miss in Chicago-Land. Grandma and Grandpa have offered to take the kid this weekend, so I hope to get some more work done. I was able to stain the boards. Next up is assembly. I need to start thinking about how I’m going to hold it all together.
June 2, 2018 update
So I consider the floor frame complete. I’ve had to add additional boards to ensure the sides are held in place tighter. I’ve been able to touch up the new boards with stain. I’ve drilled holes and secured it all with galvanized lag screws and bolts.
Now the frame is sitting in the garage. I’ll need help moving this to the back yard. It’s way to heavy for one person to handle.
I needed the frame to be competed before cutting and trimming the plywood flooring. That is the focus of our next article.
What can you do?
- Part Four
- Part Two
- Comment below, Even if it is just to check in and say Hello. I look forward to hearing from you.
- Share this article with your family and friends.
- Sign up for our newsletter.
- Volunteer to help me move the frame to the back yard. I’m flexible. When ever you have time, I need at least 4 people to help carry this to the back yard.
Like me on Facebook, follow me on Twitter, circle me on pin me on Pinterest, or watch me on Instagram.
Thank you,
Dave