This is the eighth article in our tree house project. My plan this year (2018) is to build a tree house for my son. Click here to start from the beginning of this exciting project.
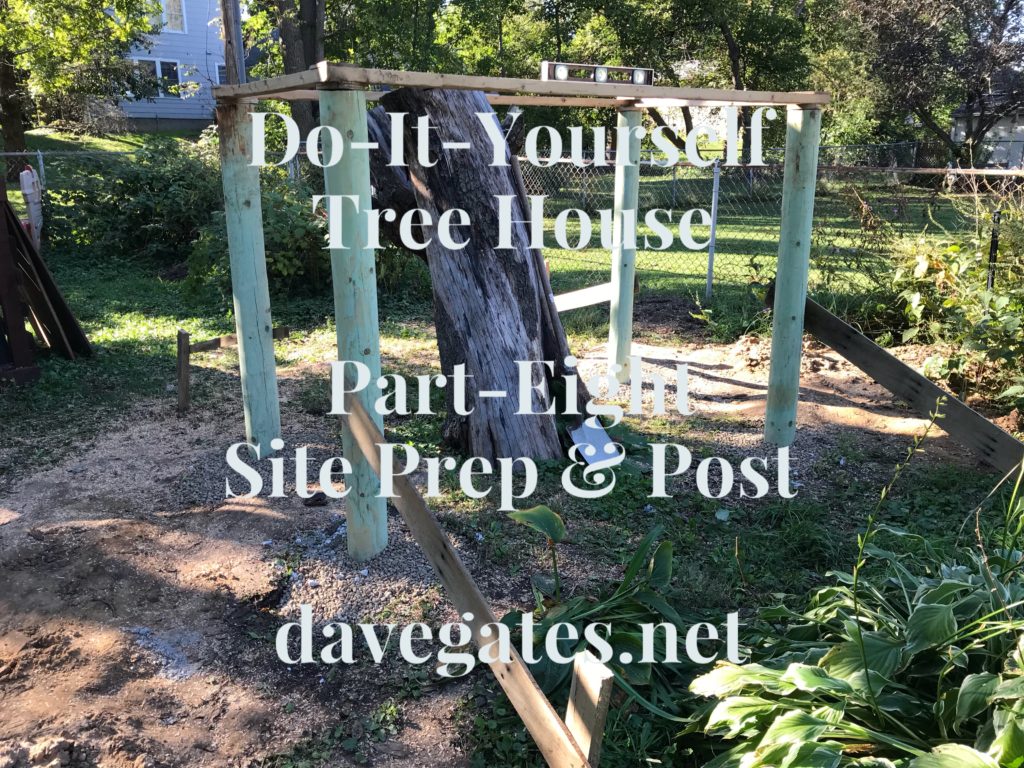
The idea is to build a hexagon shaped tree house. This article talks about the site prep & installing the post in the ground.
Here is a quick note on the plans.
- 4 (8 ft) environmentally friendly pressure treated logs. These are 5″ in diameter.
- 12 inches of gravel at the base of the post.
- 3 bags of concrete for each post.
- 3 bags of gravel to top off the extra space.
- 1 bag of decorative pea gravel for the top.
Site Planning
In order to figure out where to place the holes I needed to make a template of the floor frame. For more information on the floor frame click here. The idea is to design a simple frame and place the frame around the base of the tree, which will tell me where to dig the holes.
The frame you see here is made with 1 x 2’s. There are four circles that I used to cut and place where the post will touch the frame. In theory, this should match the existing frame which we will place on top. I used the spay paint to help show where to dig the holes once the frame was removed. Since the holes are going to be larger than the post, I only needed an estimate of where to dig.

You may be asking why the additional post and why not just sit the structure on top of the tree stump. Well. That all sounds good, but I’d feel much safer with 4 points of contact to site the tree house on.
Digging the holes
This proved to be a much bigger job than I anticipated. I’m in no shape to be digging these by hand so I resorted to renting a power auger. My thinking was to rent a small one-man auger to get the holes started. Once I had the smaller holes in the right place and at a depth I wanted, my thinking was I could rent a two-man auger with a wider drill bit to finish the job.
The smaller holes where done with a 6″ auger bit. This was exhausting and hard work, Yes, I know I’m totally out of shape and I’m getting old. But I did manage to get this part done on my own.
Attempting the larger holes with a two-man auger, ended up being a failure. I rented the auger with a 12″ bit, from my local big-box store thinking my nephews and I could manage it. For starters it, this thing was really bulky and heavy.
Second, although the retail associate walked me through how to use the thing, it proved to be more temperamental when actually putting it to use. Turns out the two-man auger does not have an ON/OFF button so you just turn the handle the other direction to turn it off. At least that was my understanding. Despite trying multiple times I was not able to get this thing to turn off. I played with it for a little while, and ultimately could not get it started again. I think i flooded it when I was trying to start it again.
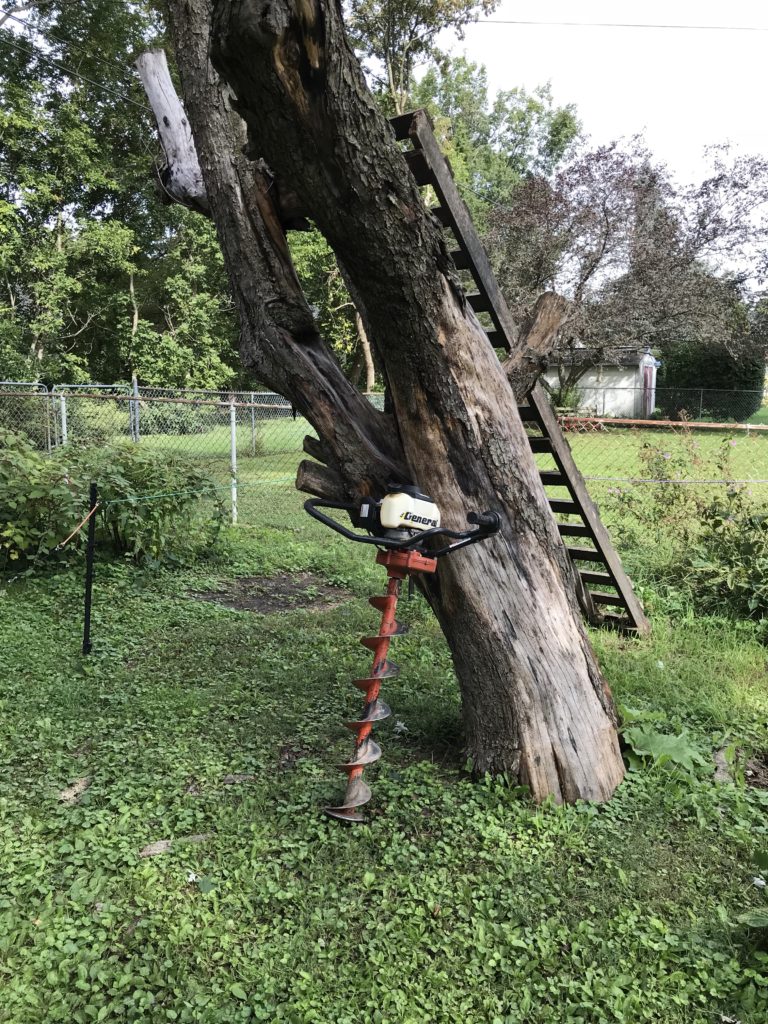
Failure, we never finished the 12″ holes and I ended up returning the auger to get some of my money back. Lesson learned, a two man auger is more like a 4 man auger. Even with the one man auger it would have been nice to use two people for more control of the tool. Funny, I took a picture of the one-man auger, and the kinematic auger, but not the two-man 12″ auger. LOL
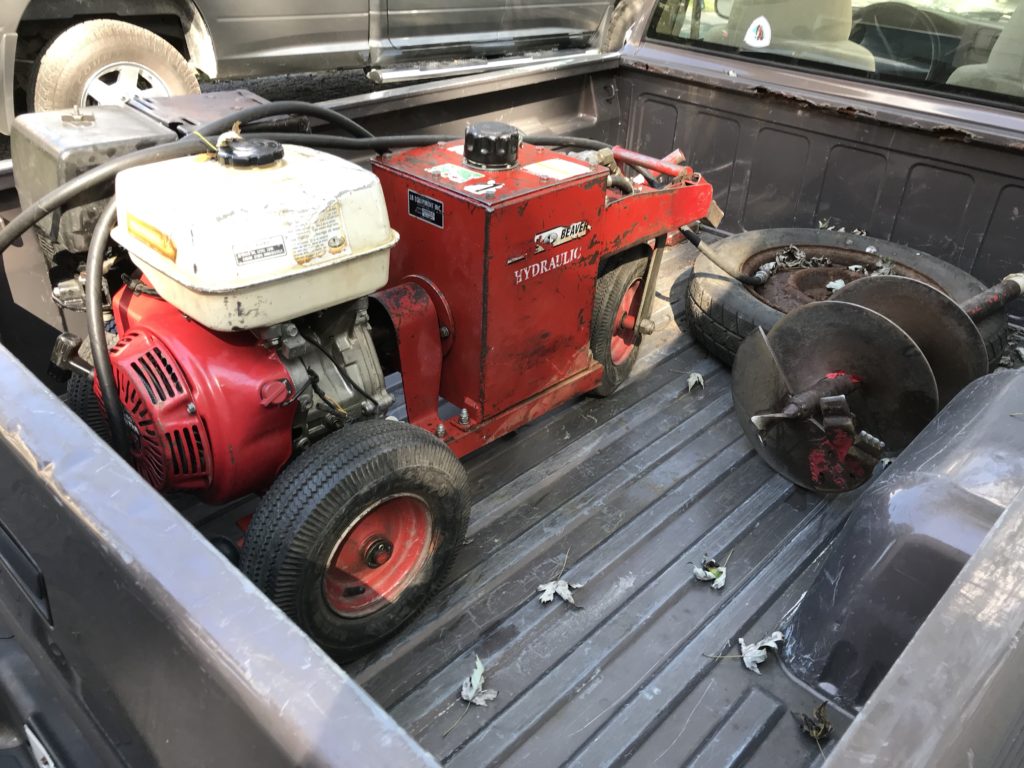
Solution, I ended up renting an entirely different auger from another rental place to complete this job. The wife offered to help, so on a very humid and mosquito infested Saturday in September we completed drilling the 12″ holes. Here is the kinematic power auger which proved to be much more effect and easier to use. They advertise this device as a one-man auger but even my wife and I struggled at times to use this thing. We are horribly out of shape.
Lesson Learned here. Make sure you have an extra set of hands. The second person on the other side of the auger makes it much easier to use. Here is a picture of the kinematic auger. Doesn’t look like much but works really well for digging bigger holes.
Another thing I learned is the one-man and two-man augers have a full spiral blade the length of the tool. The kinematic auger only has the blade half way up the tool. This makes a huge difference as the dirt has to have some place to go.
Using the one and two man augurs, If found myself always having to pull the bit out of the ground to clear the dirt. The same was true for the kinematic auger but because the blade was not the length of the entire tool, it felt more manageable. If there is a next time, I would definitely start with the Kinematic auger first for any hold digging projects.
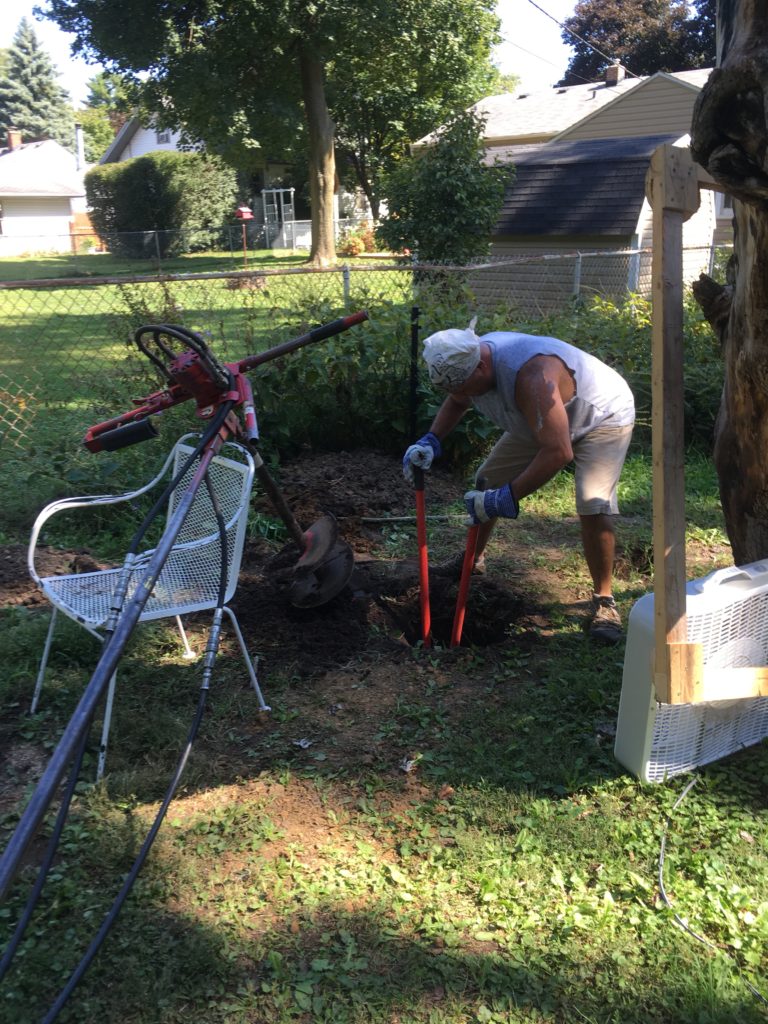
Even using the power augers, you still need to clean up the holes the old fashion way; by-by hand. The following image shows me cleaning up with the manual post-hole digger tool. This really isn’t that bad, but considering how humid and mosquito infested our yard was on this day, made the job miserable.
Note to self, I need to make sure the tree house has screens on the windows to keep out these blood sucking insects.
Yes, that’s a box fan, you see in the image, I was trying anything to keep the misquotes away. This was after I had poured on the insect repellent. Because I was sweating so much the repellent washed off my skin.
Measurements
The holes are 4 feet deep. I purchased 8 ft post, which gives me plenty of room for 3 feet of post in the ground and 5 ft of post out of the ground.
One foot of gravel and cement for the bottom to secure the post and then remainder of the space we are using multi-purpose gravel. I also purchased decorative pea gravel for the top so we are not looking a concrete or gavel at the base of the post. Yeah, I know this was not necessary but I did it anyway.
Material
- (4) 8 ft 5 x 8 ground contact pressure treated post
- (12) bags concrete mix
- (12) bags multi-purpose gravel
- Spax construction screw to secure it all together. 2 inches or longer
Cost
- $55.96 (4) 8 ft 5 x 8 ground contact pressure treated post
- $58.30 one-man auger rental, Home Depot
- $22.00 two-man auger rental, Home Depot
- $84.00 kinematic auger rental, Ed’s rental
- $48.40 chainsaw rental, Home Depot
- $30.48 concrete mix
- $19.08 pea gravel
- $29.44 multi-purpose gravel
$347.66 total for site prep & post
Updates
October 6, 2018
The post have been in the ground for two weeks now, my sister and nephews cam over today to help me carry the floor frame to the back of the yard. We were able to place this on top of the post. The measurements and template I created proved to be good idea as the frame fit perfectly on top of the post. Yeah!!
October 13, 2018
I secured the floor frame to the post, and installed the plywood sub flooring to the frame. We are ready to start building next weekend.
What can you do?
- Part Nine
- Part Seven
- The party is next weekend on the 20th. We could use the extra set of hands. Join us!
- Comment below, Even if it is just to check in and say Hello. I look forward to hearing from you
- Share this article with your family and friends.
- Sign up for our newsletter.
Like me on Facebook, follow me on Twitter, circle me on pin me on Pinterest, or watch me on Instagram.
Thank you,
Dave